New year, new order

January is always a month to put things in order for me.
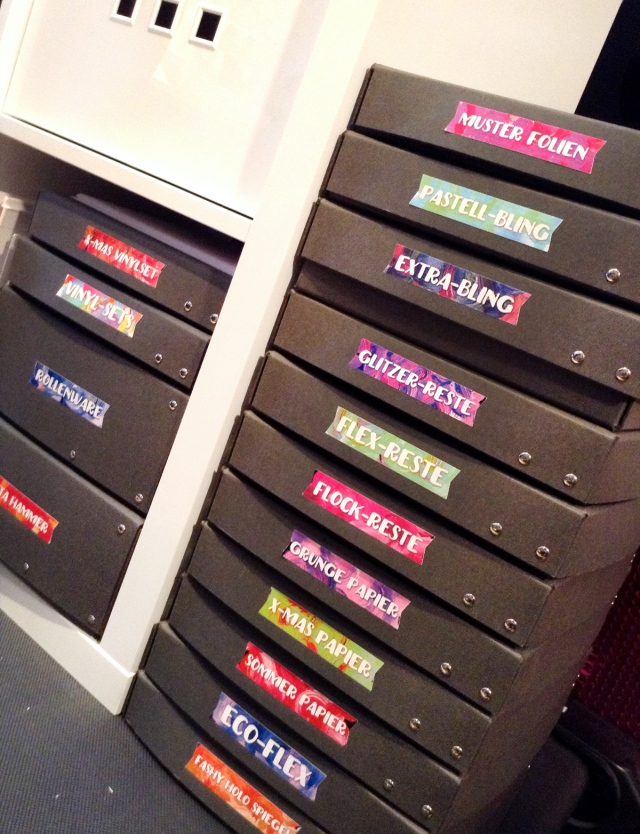
Christmas madness is over, my workshop is one big mess from too much work and never enough time. With constantly adding new products to my shops and a growing warehouse I also had to find a new system. So last week I went through the shops to find those beautiful black boxes, perfect for A4 and letter size vinyl, heat transfer sheets and papers.

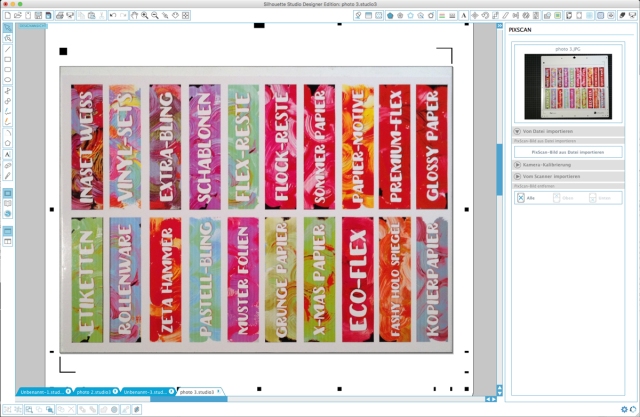
Yesterday I was playing in Photoshop what I didn’t do since weeks and was playing with some new resources from designcuts.com (the painted background graphics and the beautiful thick art font). What a relaxing day!

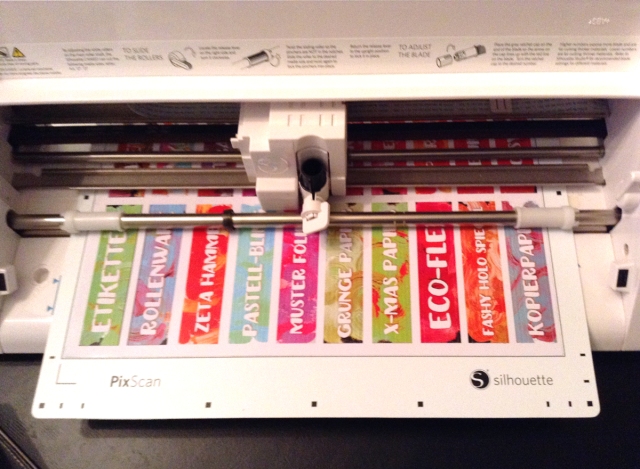
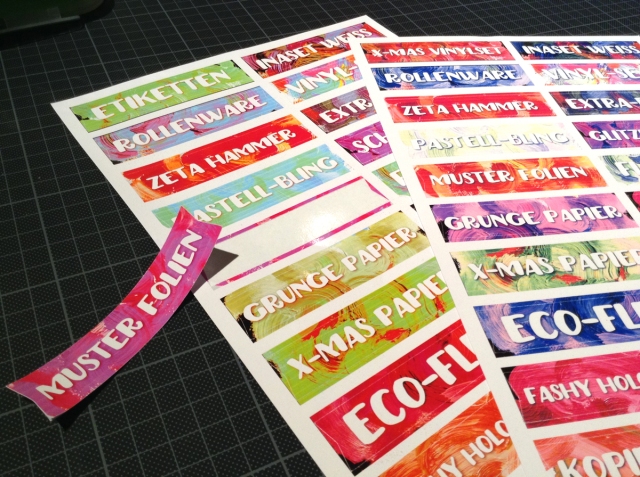
I created some sheets of stickers on glossy self adhesive photo paper, then put them on the PixScan mat and cut them with my Silhouette Cameo®.
This worked perfectly with the blade set to 1.

Combining fun and relaxation with creativity and something useful is what I like most.

Have a great day, too!

Angelika

labeling_black_boxes

stickers1

stickers2

stickers3

How to print and cut dxf files with the basic Silhouette Studio and your Cameo

Time for gift packaging!
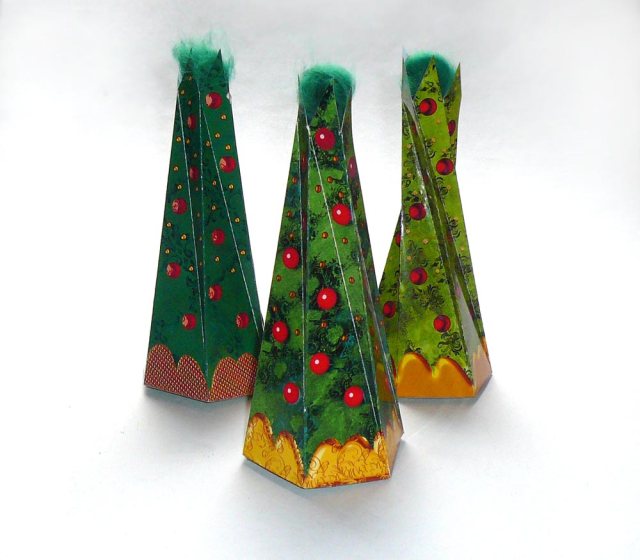
These pretty christmas tree boxes are created by me. They are perfect for jewelry and other small gifts.
They are available as cutting files, but also just as printables to be cut by hand with a scissors.

But this is mainly a tutorial for Silhouette Cameo users to show how to print and cut .dxf files and hide the cutting lines from being printed. You can use this tutorial for any .dxf file.

This way you can easily create the print and cut files with the basic version.

I do a step by step tutorial here that hopefully gives you a guide through all the steps and helps to use my and also any other dxf files with .jpg or .png images.

With Silhouette Studio, your cutter and your various printers there are a lot of different custom settings possible. So it might look different on your screen and on your system. There are also different ways to do things and this is just how I do it.
If you got a questions or you are totally stuck with something just add a comment here or contact me by email.
I will try to help as good as I can.

The cut files for the tree boxes you can get here:
Christmas Tree Boxes File on Etsy

Here we go….

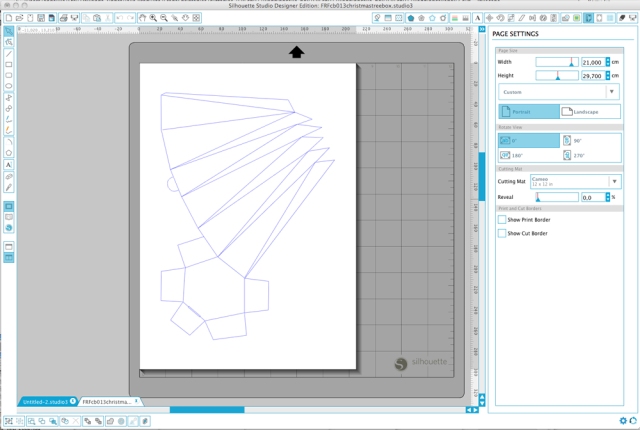
1. Open your .dxf file in Sihouette Studio. Adjust the page to your paper size

christmastree_box

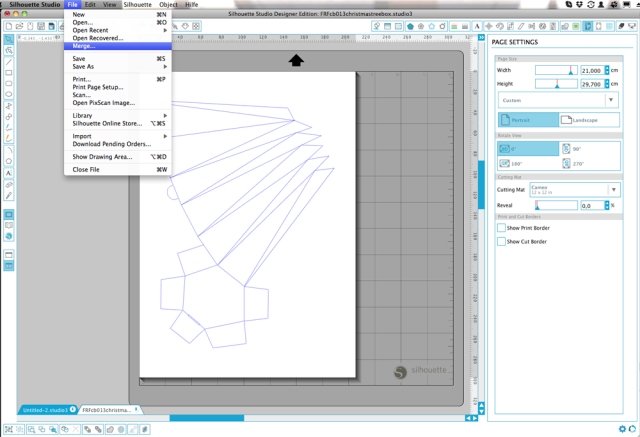
2. Merge the image (.jpg)

christmastree_box1

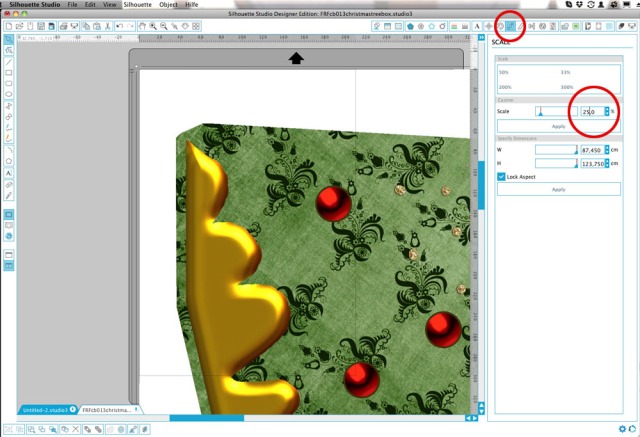
3. While the image is still selected go to the scale window and scale down the image to approx. the page size.

christmastree_box2

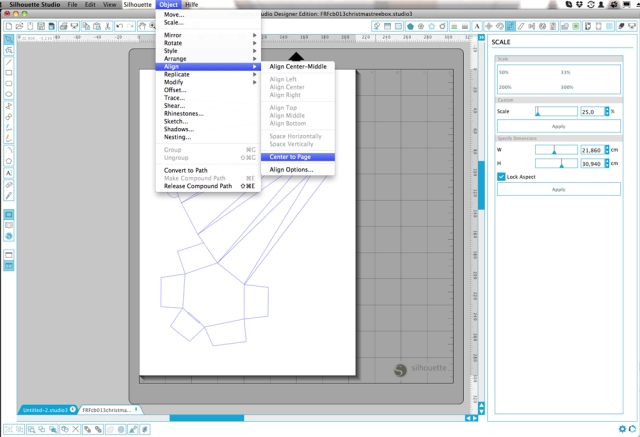
4. If the image is gone now, don’t worry, go to “Align” and center the image to page. There it is again.

christmastree_box3

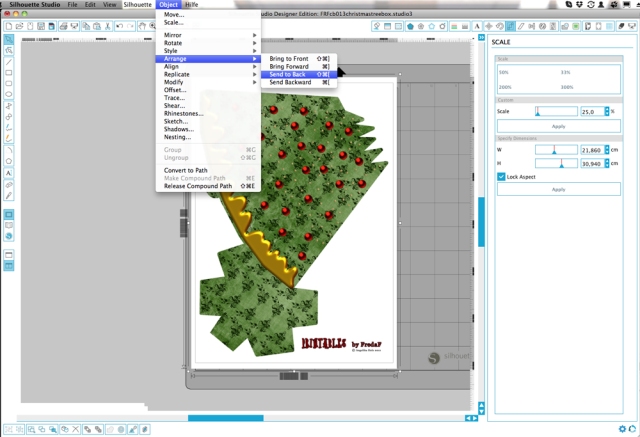
5. Now the cut lines are gone! You get them back with sending the image to the back.

christmastree_box4

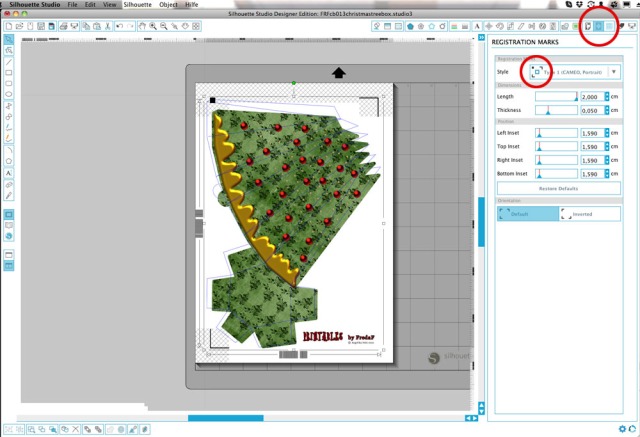
6. Now activate the registration marks and adjust the image to the cut lines, that all cut lines are inside the cutting area. The registration marks mark the maximum cutting area. Watch, there is a small bleed on my file.

christmastree_box5

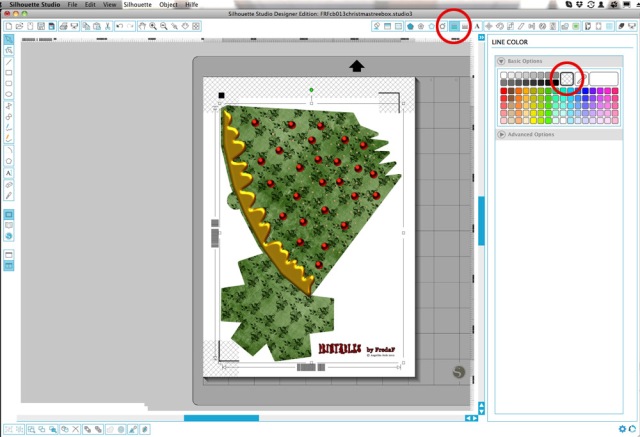
7. If you don’t want to see the cut lines printed you have to make them transparent now.

christmastree_box6

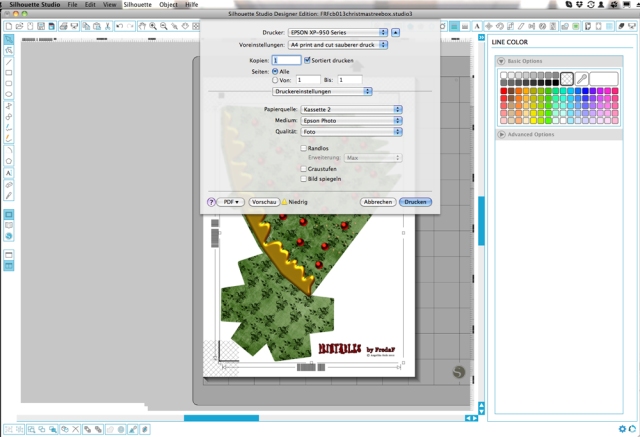
8. Now you print your page. Please take care that the page settings is set to 100% and also your printer settings are matching the page size and is set to 100%. It can be a bit tricky to find the good settings. Mine has so many options. So I created a printer preset in my printing menue for print and cut after I fiddled out the perfect settings. Best you first do a test print and cut on cheap paper.

christmastree_box8

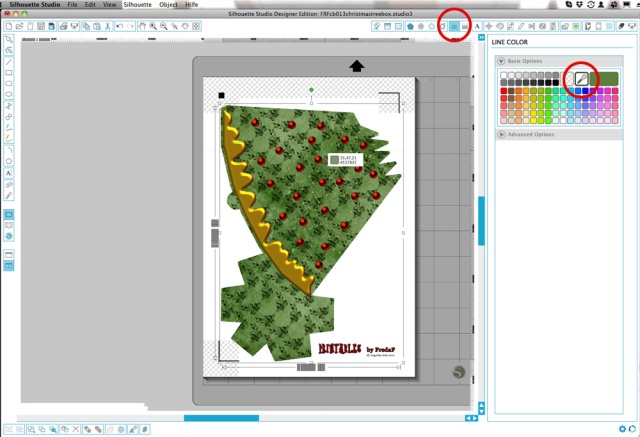
9. It happened to me, that the transparent lines didn’t cut. So now you have to color them again. One nice trick is to make them the color of the pattern with the eyedropper tool. So if you save the .studio file for later you don’t have to think of transparency anymore.

christmastree_box9

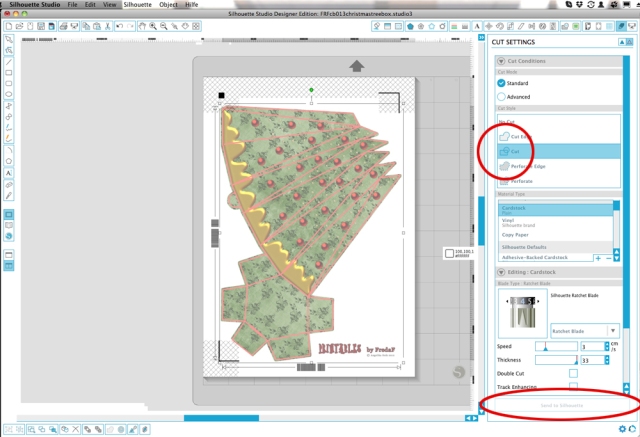
10. Now go to the cut menue, select all and set it to “cut”. Then the cut lines will show up red.
If you haven’t done it yet now save your file as a .studio or .studio3 file for later use. Then adjust the cut settings to your material, load the mat with your paper and send to the cutter.

christmastree_box10

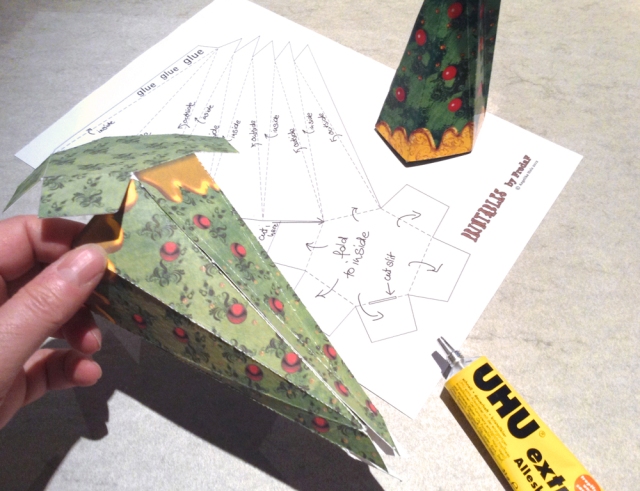
11. When all is fine it looks like this:

The finished boxes look like this:

FRF_Chrtreebox01e

FRF_Chrtreebox01f


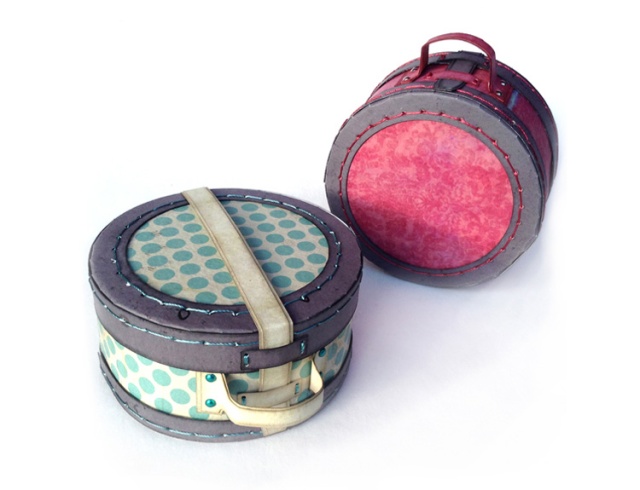
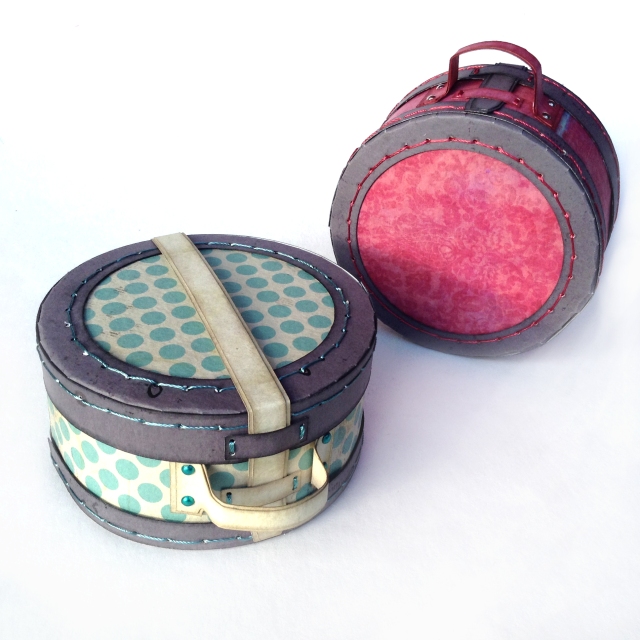
Hat Box Tutorial – DIY craft project for electronic cutting machines

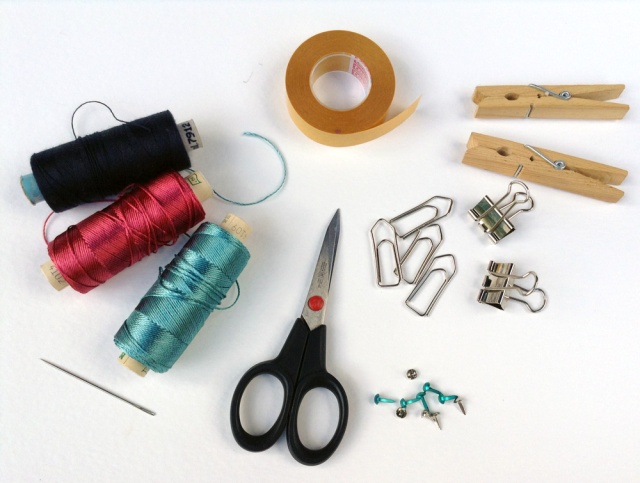
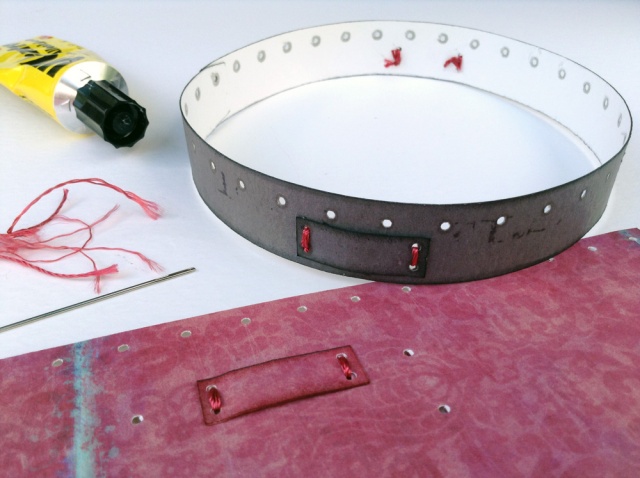
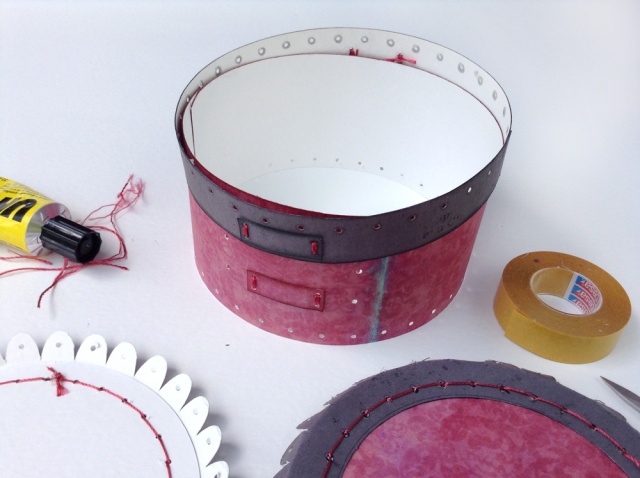
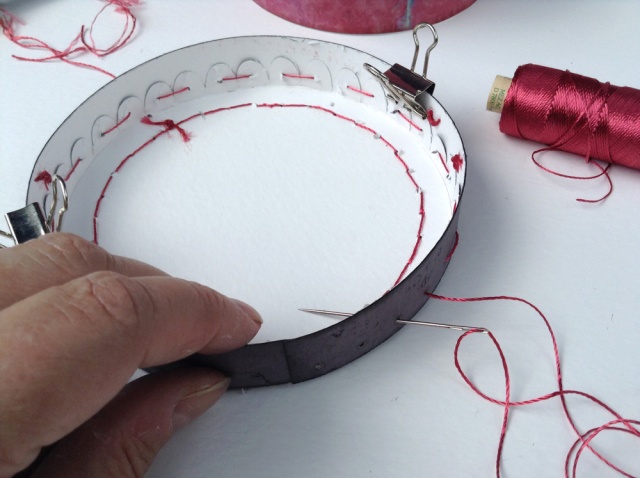
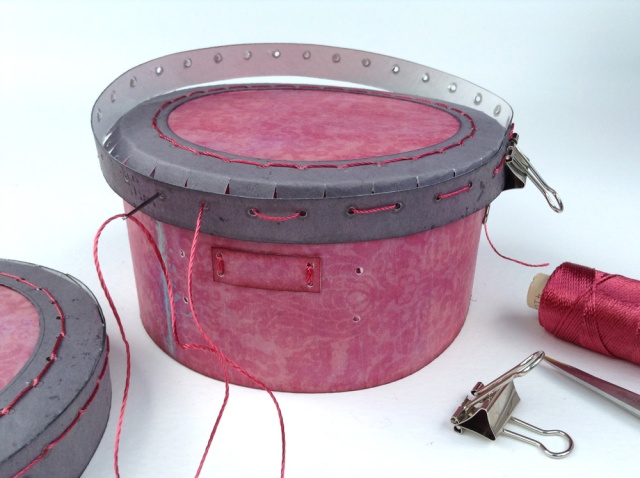
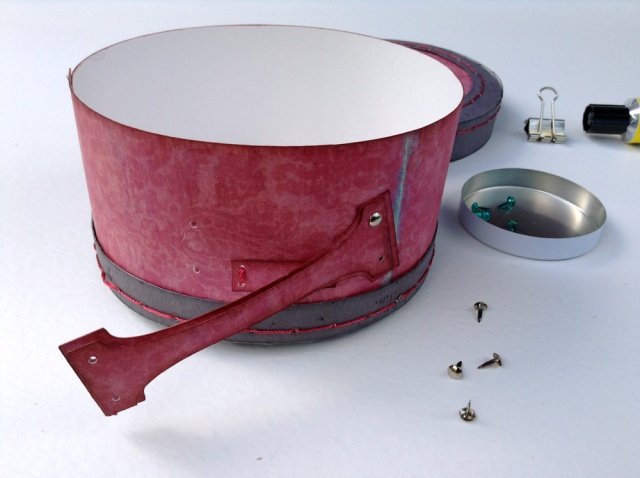
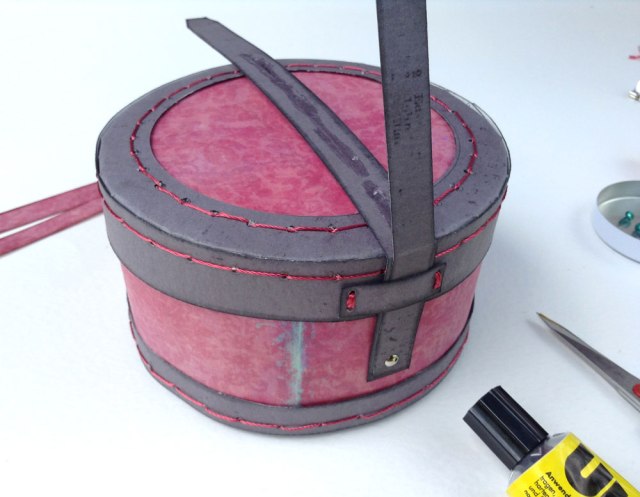
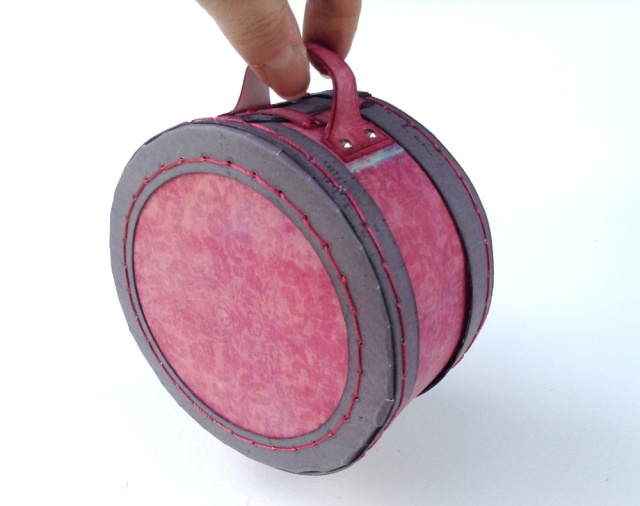
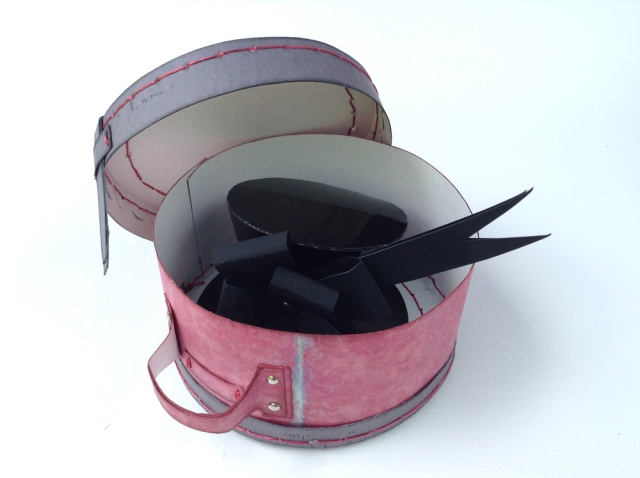
This is a step by step tutorial to create the charming little paper hat boxes I just released.
It is cut on a Silhouette Cameo, but it should work also for similiar cutters and software which is svg compatible.

You can get the svg file here:
https://www.etsy.com/listing/198100414/svg-hat-box-digital-cut-file-diy-project

Tips:
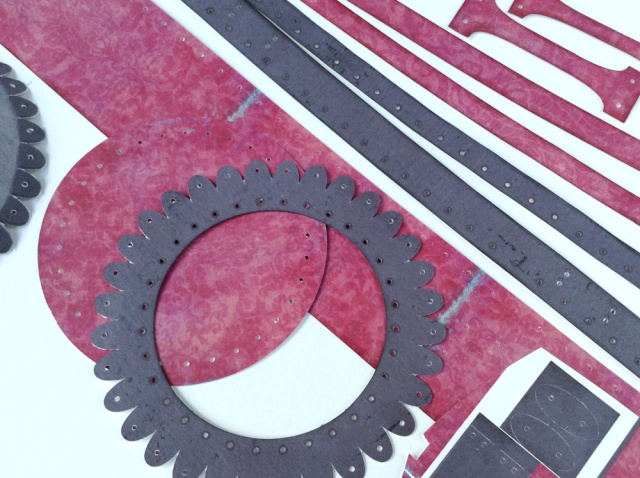
– cut the files twice with matching paper and combine them, so you get directly two beautiful bicolored boxes
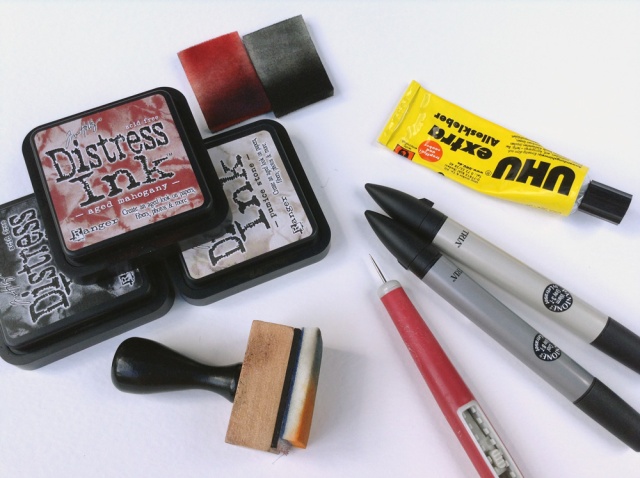
– edge blending (coloring the cut white paper edges and holes) gives the box an even more realistic and used look.

Be prepared the first box will be a bit tricky and fiddling until you know how to hold everything best.
Depending on the thickness of your paper the parts are fitting more or less tight. You might have to adjust the parts a little bit in width.

The second box will be much easier, big promise! And from the third it will be a breeze and so much fun.
I guess your friends and family will rib them out of your hands.

Much success and please contact me if you need help!

DIY paper hat box tutorial
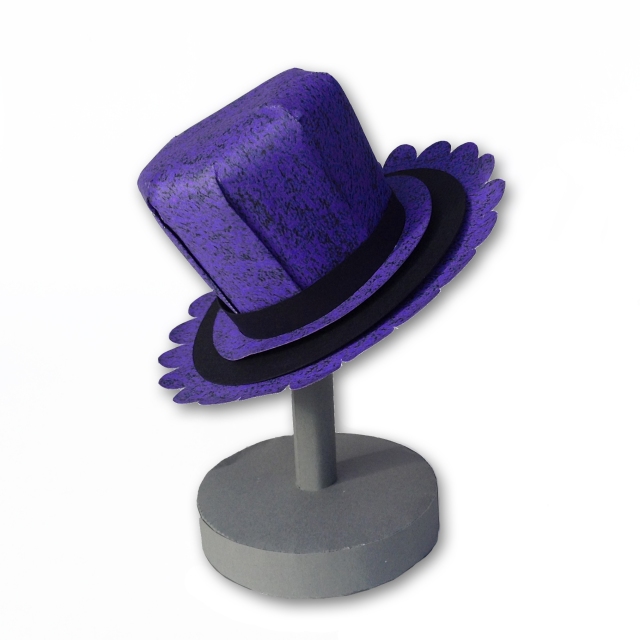
hat-box13 hat-box12 hat-box11 hat-box10 hat-box9 hat-box8 hat-box7 hat-box6 hat-box5 hat-box4 hat-box3 hat-box2 hat-box14hat-box1 goth_mini_hat


Hats hats hats…

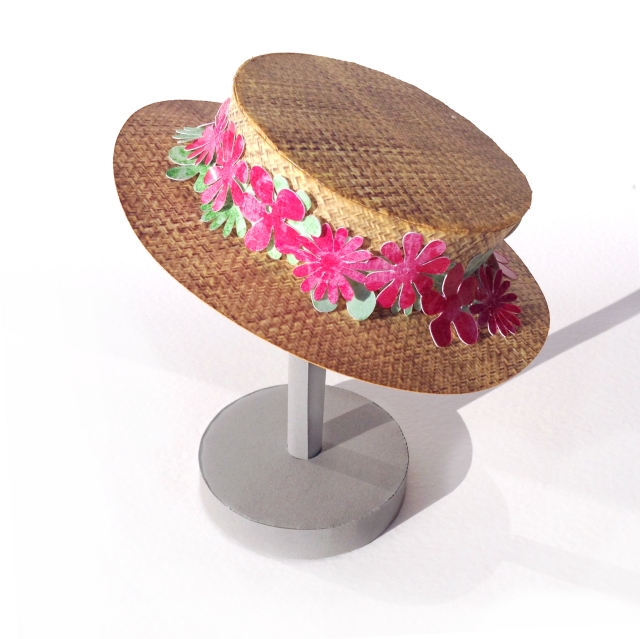
Going on making little hats…this is so much fun. I was totally lost in hatmania.
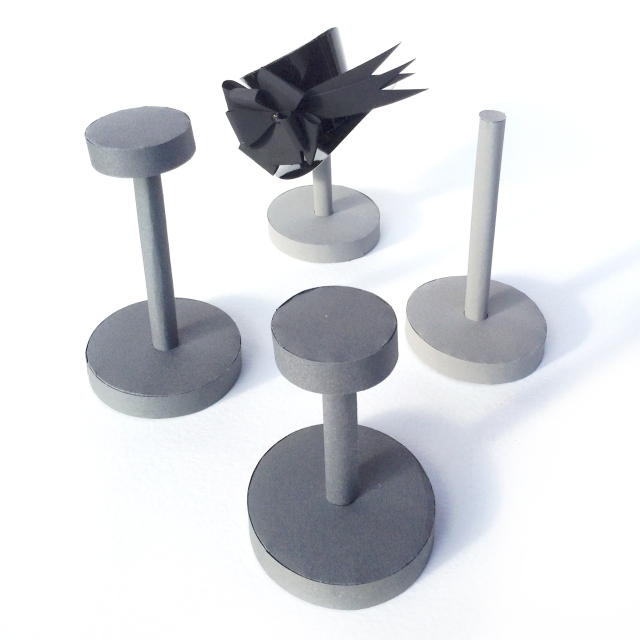
I also made some displays and hat boxes. The little hats just fit in. I think I am going to sell these cutting files soon, not yet sure where, but I am going to announce this here and I am also preparing tutorials, especially for the hat box, which is quite a bit complicated.

edited 07/31/2014:
at last available in my Etsy shop:

www.etsy.com/shop/FredaFprintables


paper hat box diy crafts


paper hat stands displays


paper doll hat


summer hat with flowers


More advent calendar ideas

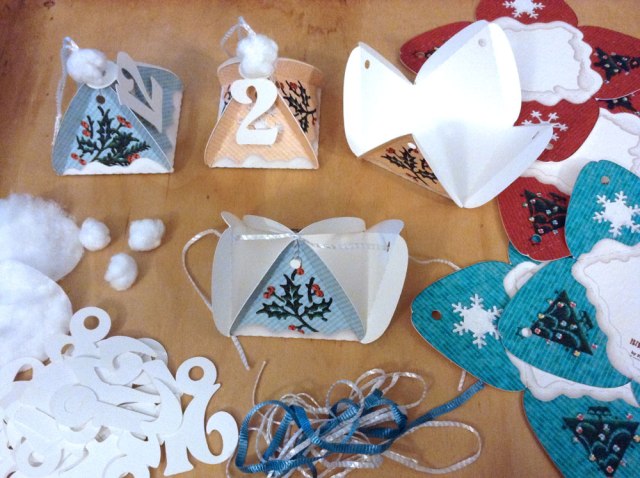
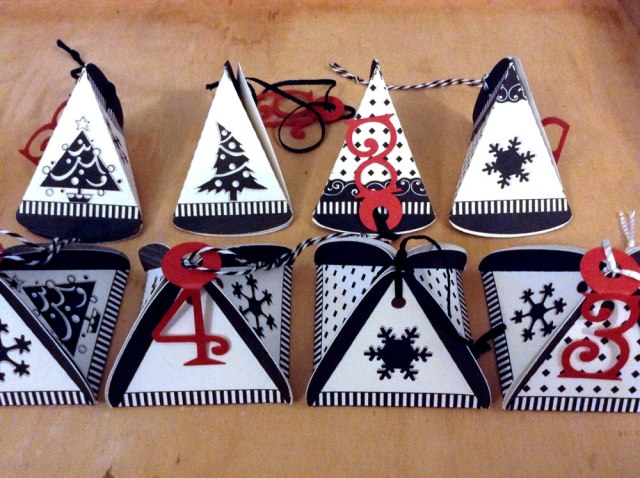
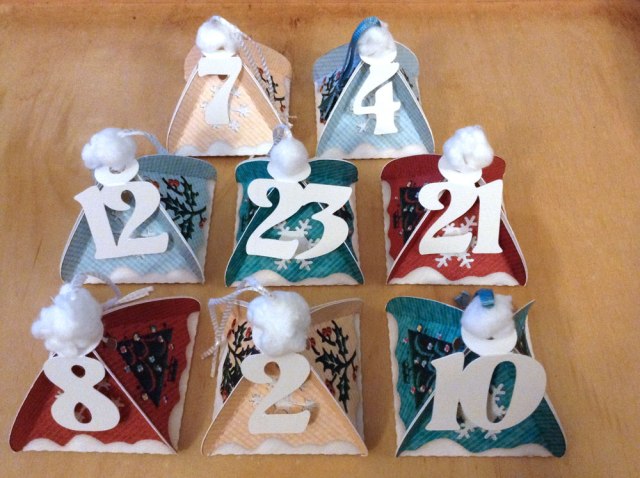
I am still busy to get to know my new cutting machine better, so making an advent calendar with many boxes was the perfect project to practice. You can buy the numbers and templates as .pdf in my Etsy shop if you’d like to make one for yourself or your beloved ones.

I have already put an eye on a model air plane construction kit in 70 pieces as a filling, super easy, big fun and much more healthy than candy.

Templates colored version
templates black and white version

red numbers
white numbers

colored_advents_calendar2

colored_advents_calendar

adventskalender_boxen_sw1

adventscalendarboxes_black_white2

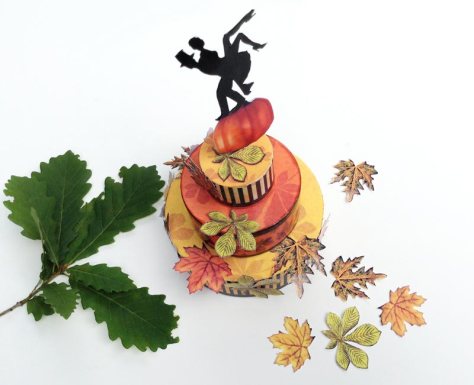
Fall wedding cake DIY printable gift box craft project – step by step tutorial

Today I released part 2 of my fall wedding cake paper gift box DIY printable craft project with autumn leaves, chestnuts and a bridal pair dancing on a pumpkin.

Pheeewww….this was my attempt for google search optimization….lol…having all important keywords in the title AND in the top of the description, sorry to the readers.

So this is the step by step tutorial for this advanced but fun little project, that hopefully will bring you a couple of relaxing hours incl. the walk for some natural decoration and a lot of ah’s and oh’s when given away (guarantied!).

The printable files you’ll get here from my Etsy shop:
https://www.etsy.com/listing/160216656/fall-wedding-cake-favor-box-diy
autumn_wedding_box15

———————————————————————————————————————

1. Print all 3 sheets, No. 1 has to be printed twice, so you got 4 pages
First cut the straight side wall parts of the box except the zigzag lines.
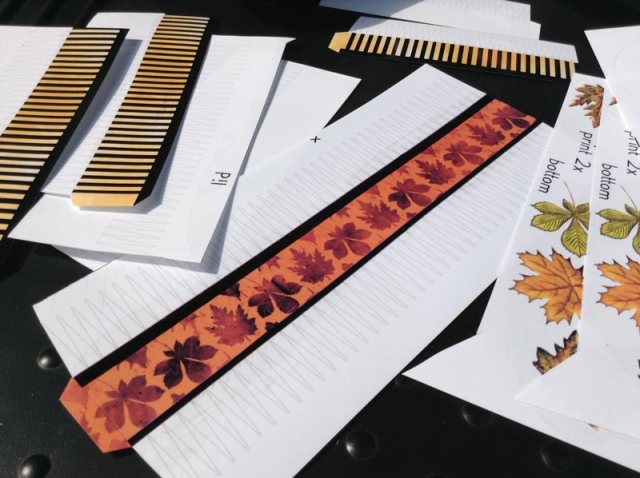
autumn_wedding_box1

2. Crease the lines between the zigzag lines and the visible side walls with a ruler and a pointy tool and fold them.
It is urgent, that you do this before cutting the zigzags. Later it is much more difficult to fold them properly.
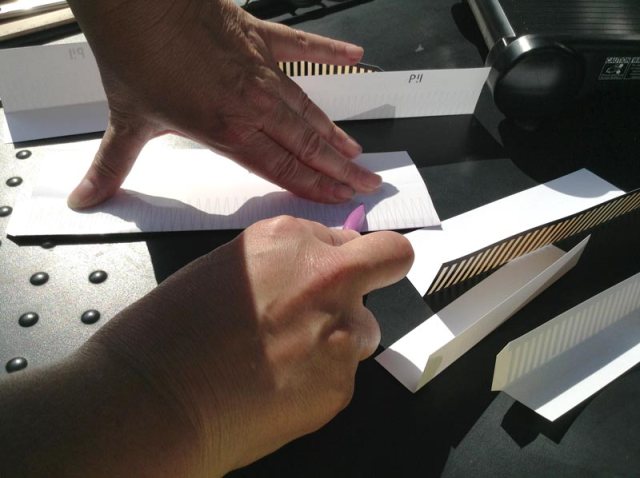
autumn_wedding_box2

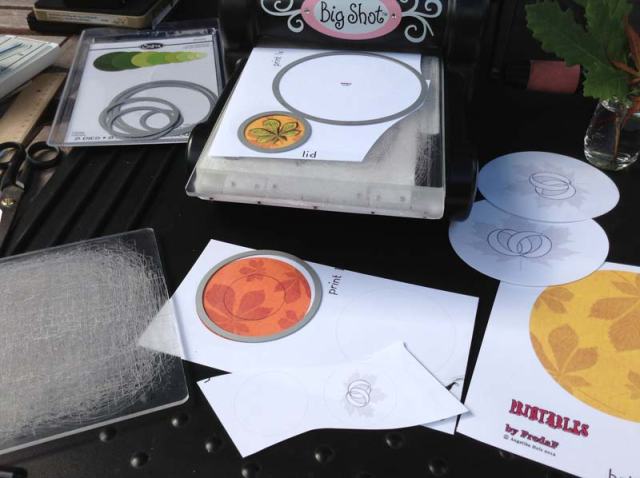
2. Cut or punch the circles. I used my Sizzix Big Shot and the Sizzix framelits here.
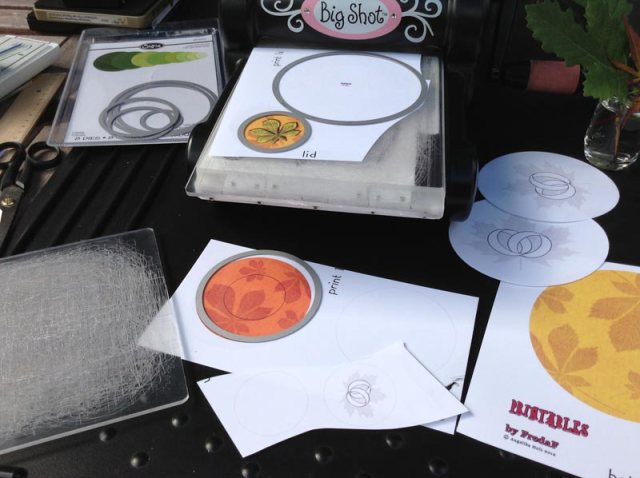
autumn_wedding_box3

3. Now cut the zigzag lines. I used my die cutting machine here, too with the Tapered Fringe die by Tim Holtz. This works great and is a big time safer.
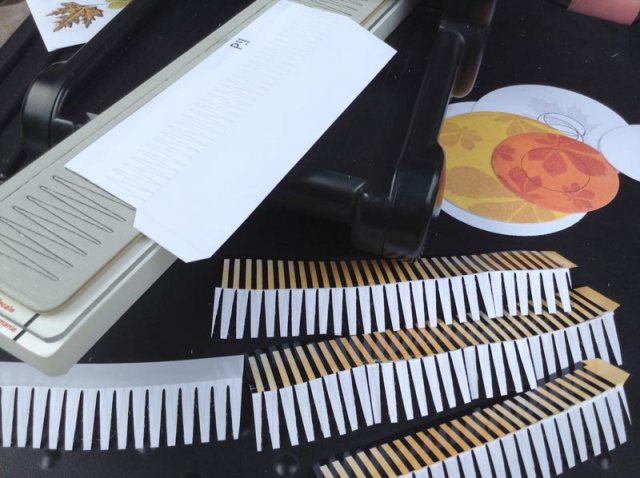
autumn_wedding_box4

4. Fix double sided tape to close the side walls. You can do this with liquid glue, too.
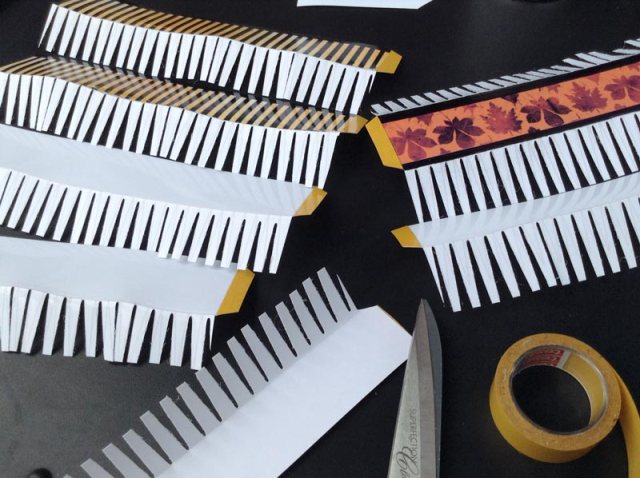
autumn_wedding_box5

5. Now close the side walls. The biggest ring for the bottom is made from 2 parts!
Before you close the inside walls check the size, that they fit into the bigger outside easily. The white little ring on the pic below is orange for you! I changed this afterwards, much better now…
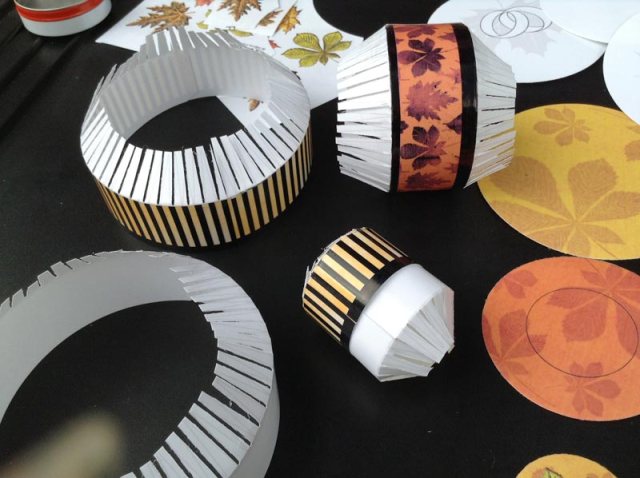
autumn_wedding_box6

6. Add liquid glue on two of the little circles, the printed top and the one with the rings.
Fix the little top ring inside and outside with the two circles. The inside circle gives the ring its precise shape.
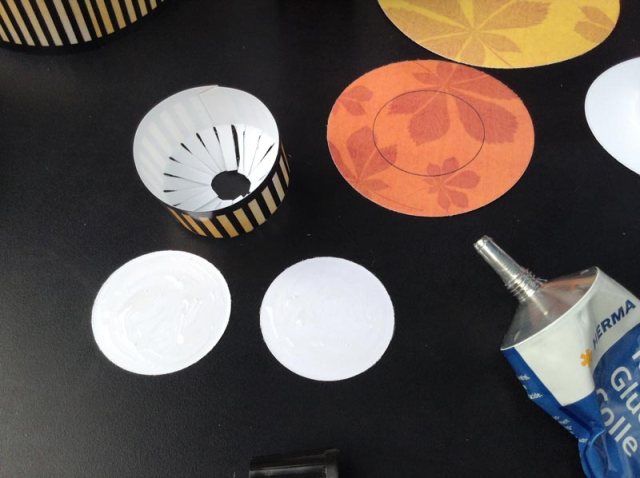
autumn_wedding_box7

7. Add glue on the third little circle and on the printed middle top inside the thin line.
Then add the little ring on the middle part and slide the little white circle inside the ring and press until it is well fixed.
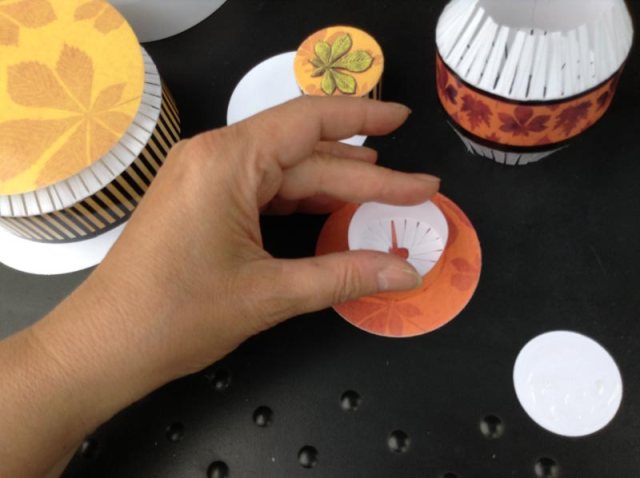
autumn_wedding_box8

8. Build the bottom box and the bottom lid in the same way with the biggest parts.
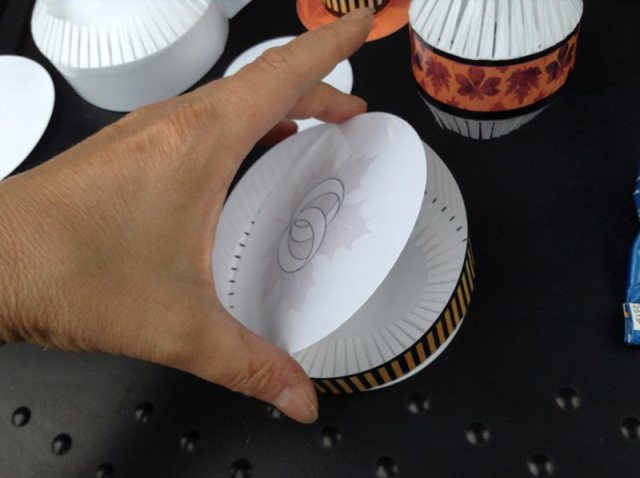
autumn_wedding_box9

9. Now add glue to the middle sized circles and fix the top box part onto the middle ring with sliding a white circle inside to strengthen the shape.
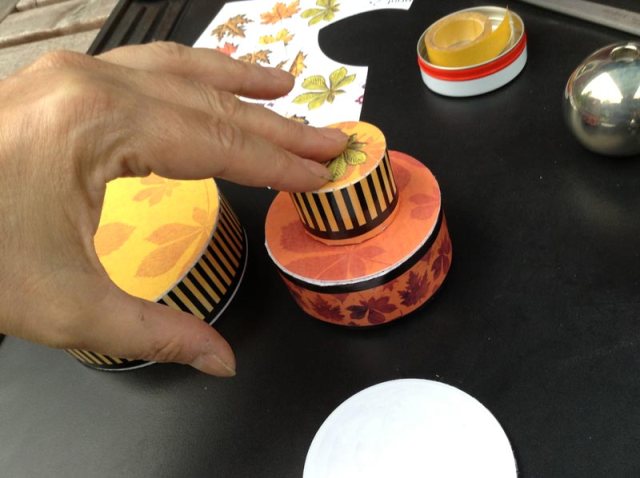
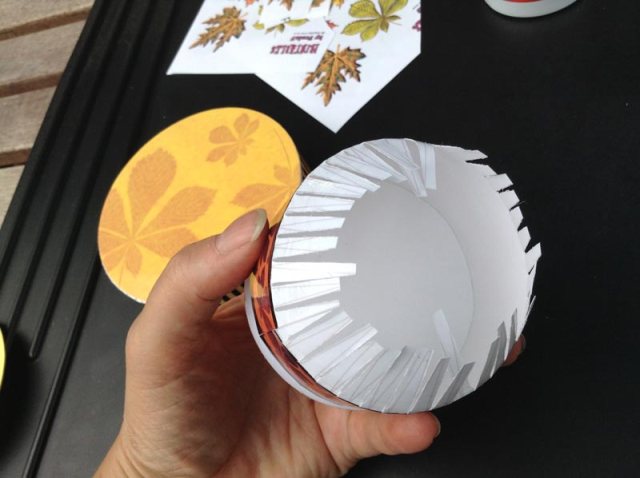
autumn_wedding_box10

autumn_wedding_box11

10. Add glue to the fringes of the middle box part and press it carefully onto the bottom box.
Make sure all is well fixed and dry when you release it. You can put something round and not too heavy on top for a while to press the whole construction together. I put a little tin under the lid for drying, so there is not too much pressure on the side walls and a little tin on the top.
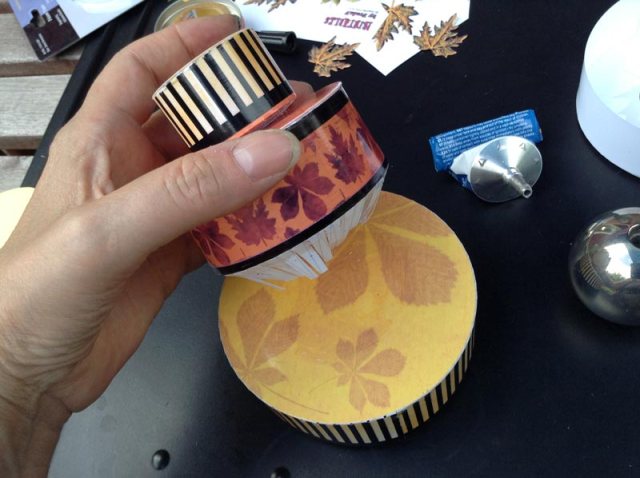
autumn_wedding_box12

11. Now cut the embellishments

autumn_wedding_box13

12. For the bridal pair you first fold the black block behind the silhouette, glue it, have it dried and then cut it.
There are two little “feet” on the bottom. You can make a slit into the tope of the box and slide them in, so the figures are standing upright.
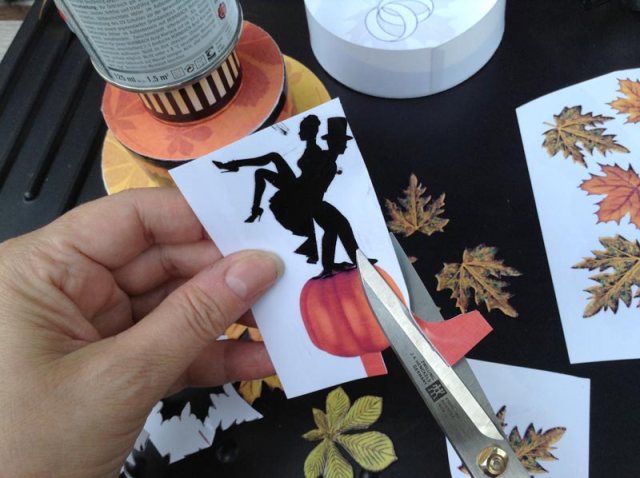
autumn_wedding_box14

At last you fix all the embellishment to your liking.
I used a black and an orange brown felt marker and drew around the edges where they did not look clean or too white from the paper.
But I have made some little changes on the product, too while working, so your result should be better than mine 🙂
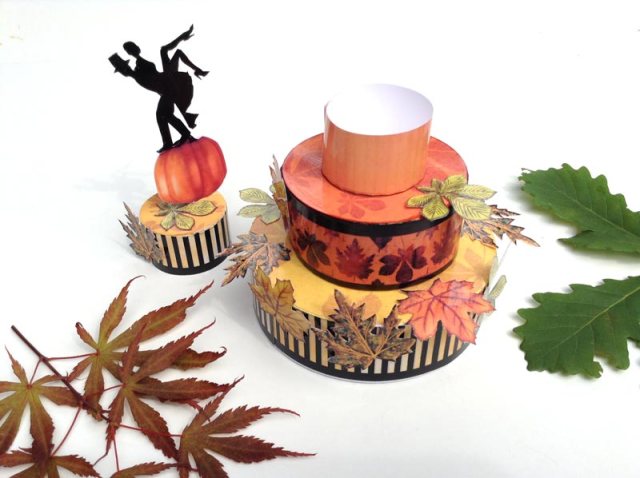
finished_wedding—box

 I hope you had fun and maybe a beautiful gift box now and that you will come back soon!
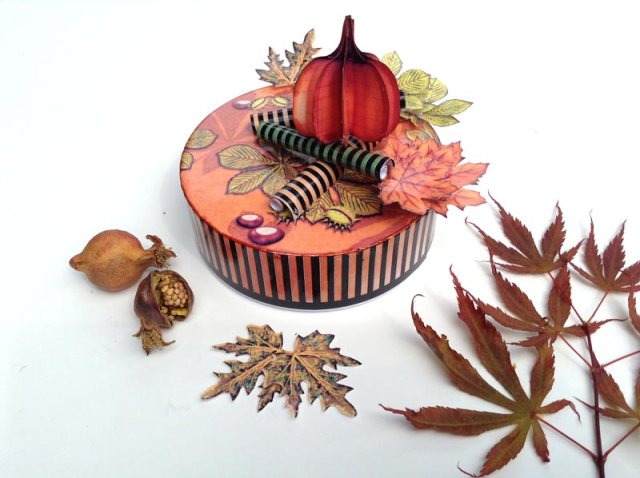
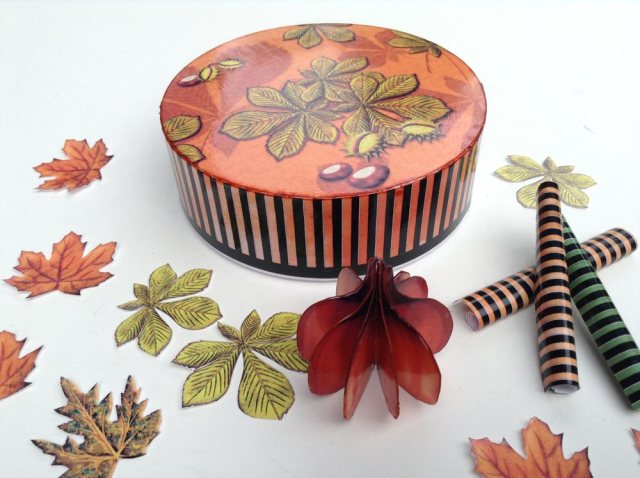
Fall into autumn – leaves and chestnut gift box DIY crafts project

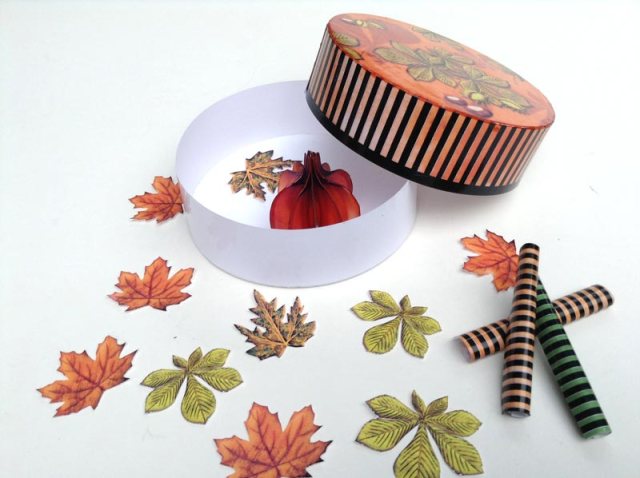
Last weekend we had fantastic weather, perfect temperature, no wind. So I grabbed all my crafting stuff including my sizzix big shot and occupied our terrace table shamelessly for the whole day. I had prepared some fall / autumn printables during the week and I started with this lovely gift box in warm colors.

As always you can get some inspirations for your own projects or you just buy the templates from my Etsy shop. Have fun!
http://www.etsy.com/listing/160077065/printable-fall-favor-box-warm-autumn

diy autumn gift boxes

autumn-boxes1

diy favor boxes

diy favor boxes

and more 4th of July crafting…stars and stripes box tutorial

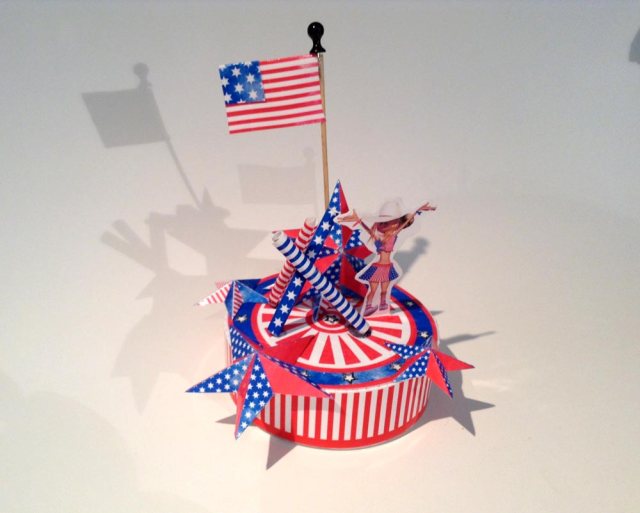
Have fun to build this lovely 4th of July Independence Day gift box. You can get the template in my Etsy shop (it is just $3.50) or you are inspired enough to construct something similiar yourself.

4th of July stars and stripes DIY printable gift box

This is what you need:
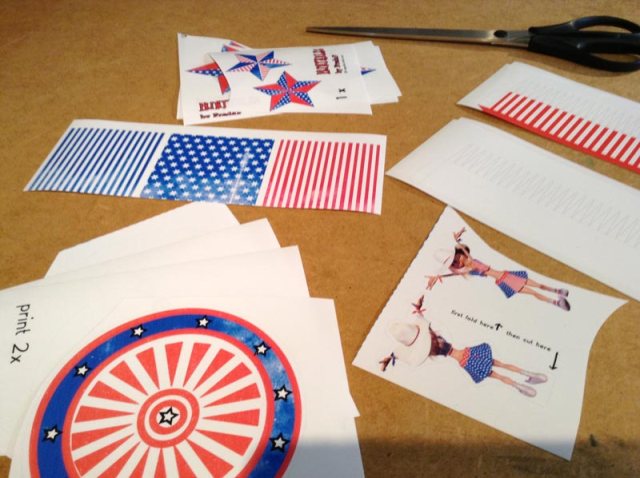
3 printed sheets (I used heavy glossy photo paper)
scissors, ruler
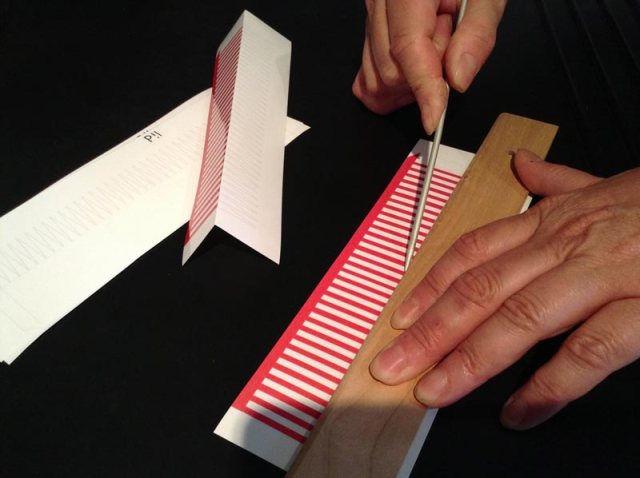
something to crease edges ( I use a knitting needle, but there are cool tools available in craft shops, too)
liquid glue, double sided tape

Take care that you print all sheets on the same size. It just happens that the printer settings are changing from one to the other…techniques!
Then you roughly cut the parts and sort it.

Gift box tutorial stars and stripes

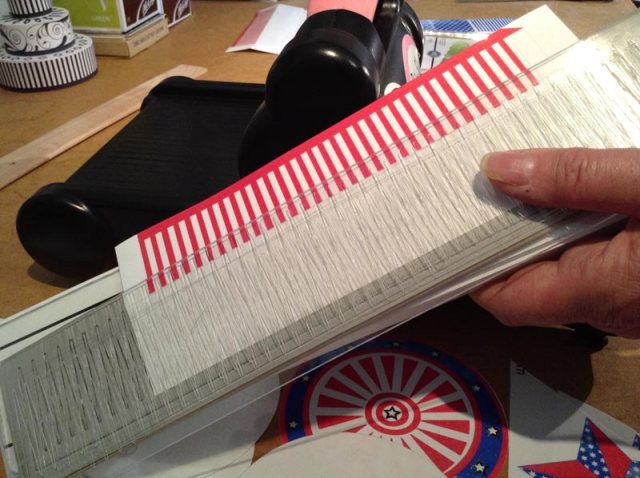
Then crease the edges of the side parts between the rectangle and the zigzag lines urgently before cutting! This makes it much easier to fold the parts later.

Independence Day Party Favor

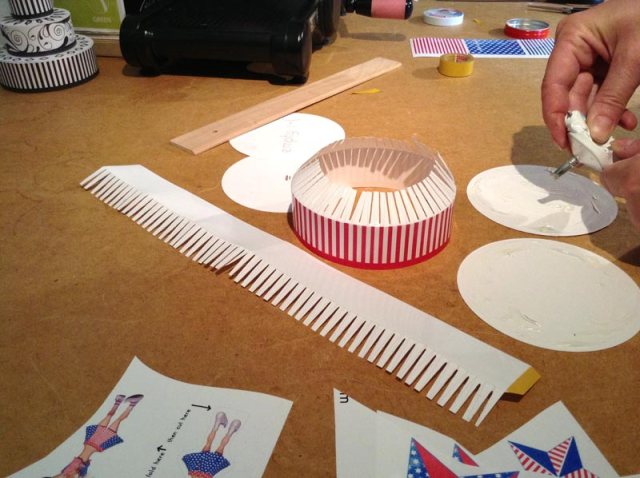
Next you cut the circles and zigazg lines. I am die cutting this with my sizzix big shot. The biggest circle of the sizzix framelits is perfect and the Tapered Fringe by Tim Holtz goes well for the zigzag lines.
But you cut it easily by hand, too.

Independence Day Party Favor

Close the side parts with double sided tape

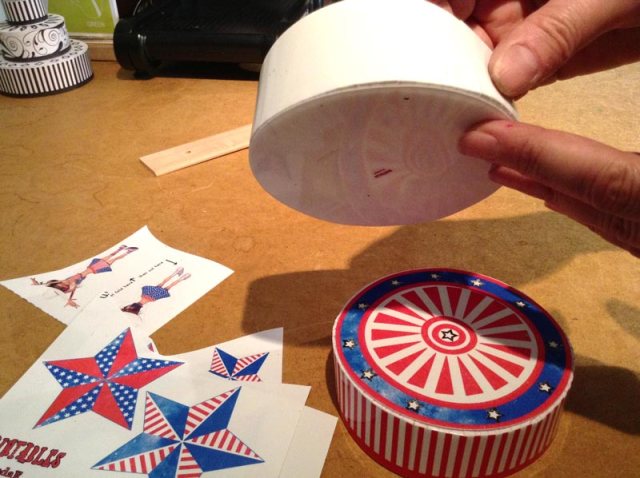
Add the circles on top and bottom of the box lid, the fringes have to be between the circles. Then try the inner parts, while it is not yet fixed to see if it fits and if necessary adjust before closing the round.

Independence Day Party Favor

Independence Day Party Favor

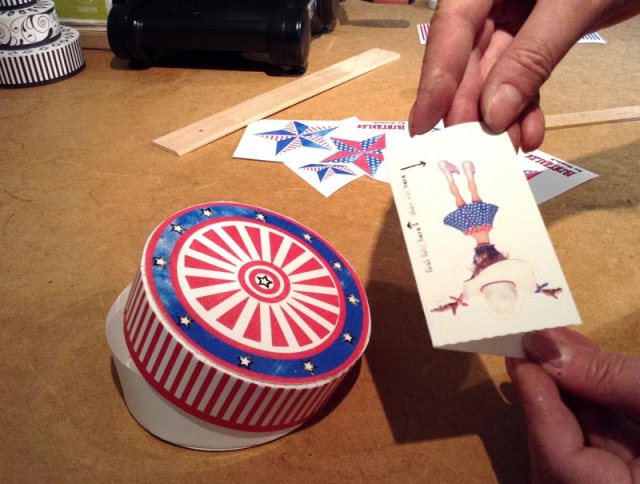
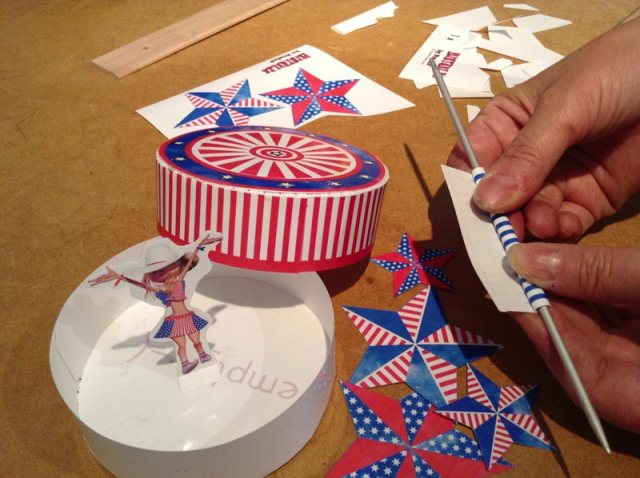
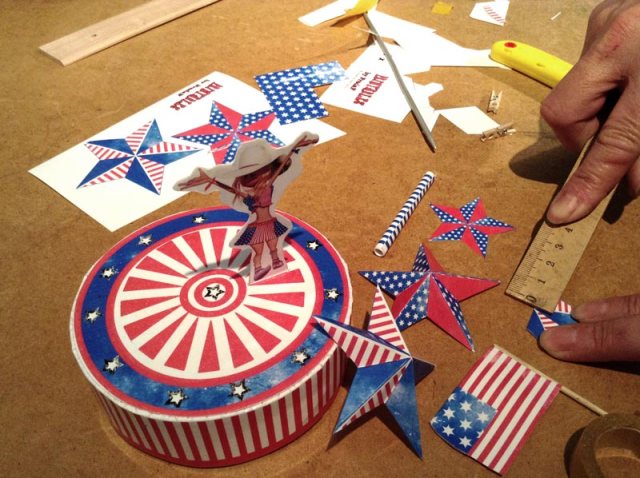
Take the figure and fold along the dashed line in the middle of front and back figure. Add some double sided tape to glue it against each other. Then cut the figure carefully leaving a bigger white rectangle on the bottom to make her stand. With making a slit into the surface where you want her and pushing the ends under it you can make her stand.

4th of July gift box

I love those striped sticks. They are so versatile and always perfect to pimp up something, that looks a bit boring. You just fix a stripe of double sided tape on one side, then roll it up from the other side over a knitting needle, so easy!

4th of July gift box

The stars you can make 3-dimensional by folding them up on the long and down on the short edges. First crease all the edges, then fold into shape. This is much easier than you might think!

Gift box tutorial stars and stripes

At last you assemble all the parts and fix it with tape, glue or best with a hot glue pistol.
Don’t worry if some parts are not looking 100% proper and clean. With the worn and stamped looking print this doesn’t matter at all.

Have a great 4th of July!

4th of July gift box

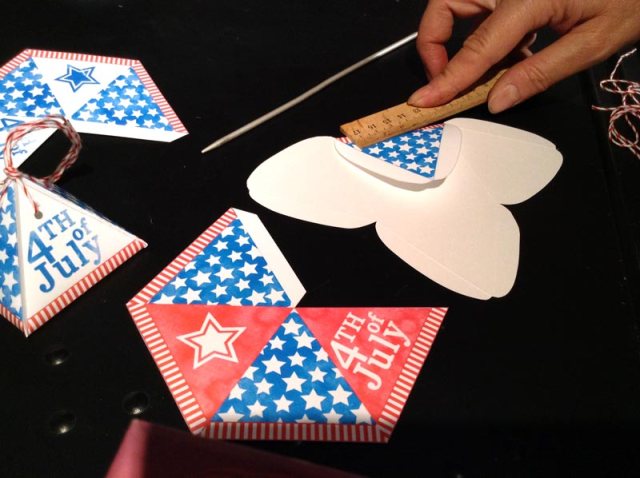
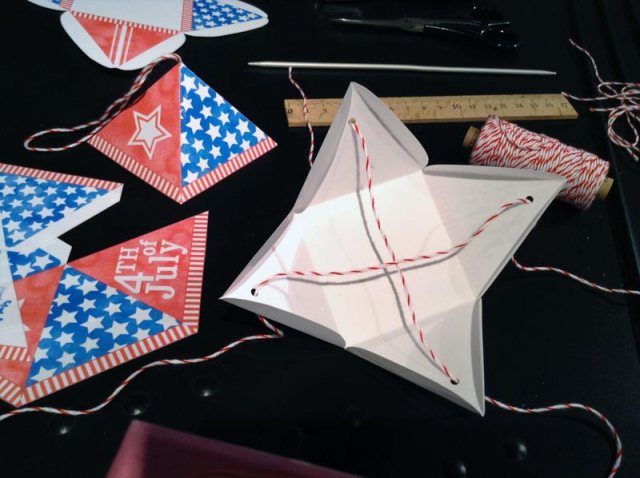
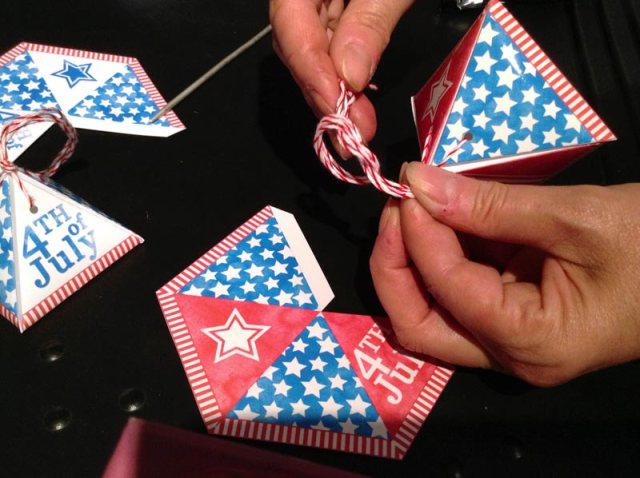
How to make little “4th of July – stars and stripes” gift boxes and decorations

Yesterday I was busy creating something for independence day, the 4th of July in USA:
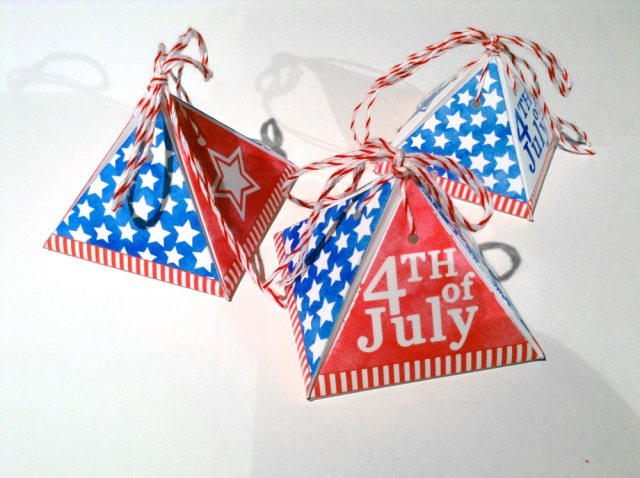
I took one of my pyramid box templates, added stars and stripes and some rubber stamp effects in Photoshop.
If you don’t want to make this yourself you can get the templates from my Etsy shop.
The boxes are perfect for a little favor of gift. The lids you can also use hanging as decoration for your party.

Have fun!

Pyramid box DIY stars and stripes

DIY 4th of July party decoration

DIY pyramid gift box

stars and stripes gift box

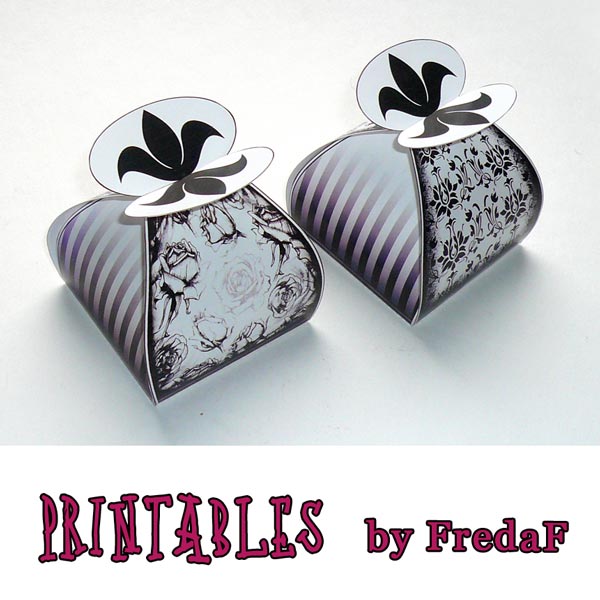
DIY Chocolate or Jewelry Boxes and Gift Packaging

In May many people I know are having their birthdays including me 🙂
We stopped to give away big gifts to each other long ago, but a little something, some chocolates, candy, a beautiful soap or a lovely little piece of jewelry from a hand made marketplace is always nice to give especially when it is beautifully packed.
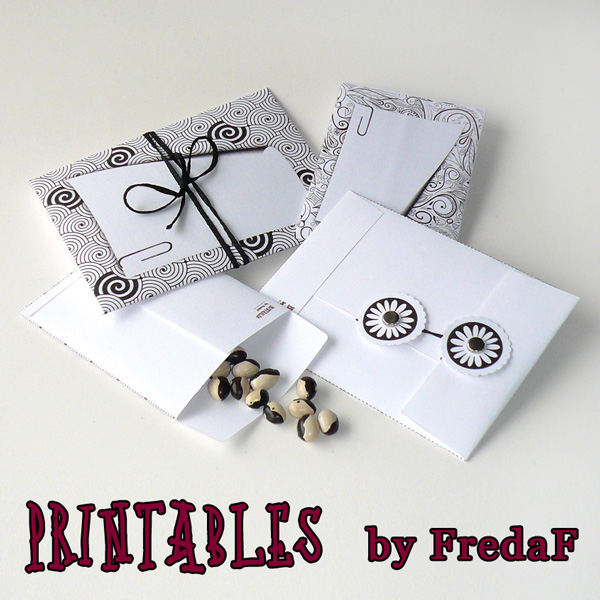
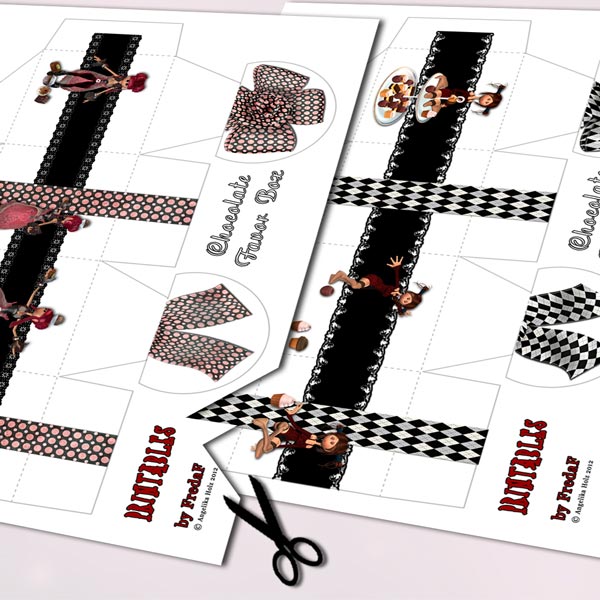
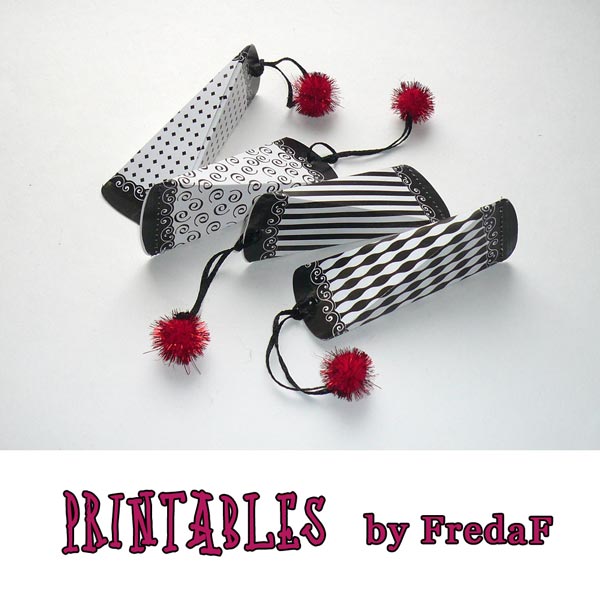
A while a go I created these easy to build boxes and envelopes. You just print them on your home printer, cut them and some have to be glued, the favor boxes don’t.
They are looking beautifully in black and white and if you mess one, you just print it again.

The templates you’ll get from

Etsy or

Digiscrapstation

Have fun!

Printable envelopes templates with memo note tag

DIY printable favor box, roses, vintage, black white

Chocolate favor box with bow, DIY printable, black, white

Printable black and white gift boxes, set of 4