Our perfect dog bike trailer

We stopped biking since we have our lovely little Shiba Inu girl Akira and it is a pity, because we live in a surrounding where biking is perfect. But I do not have the dog stay alone at home while we are having fun outside. For running with us I do not know how far she comes and for a basket or back pack she is too big.

This spring I said we need a solution. So we did some research and ended up with this trailer with a straight box. Last weekend I made a fitting cushion. I used material I still had around here – a piece of black denim (inkl. a test print with orange fabric color), a piece of 2 inches thick foam material for the bottom and that beautiful jacquard fabric with woven butterflies and flowers.
The top fabric is fixed with hook-and-pile tape, because I cannot wash it. The whole bottom inkl. the two bags for bottles I can put into the washing machine, which might be necessary often for a dog cushion. The hole for the leash getting inside the box I stiffened with faux leather.

We tried to get her used to sit inside and it worked well. She is a clever dog and I think she understands, that it is for her to come with us. The first test drive up and down the street in front of our house went very well even without leash, so we can’t wait to do bigger trips now.

Have fun and a sunny Sunday!


Beauty bags from waste paper, magazine pages and transparent htv

I found some big sheets of card stock, that I had left over from cutting with the cutting machine. At the same time I found an oversized magazine with beautiful photographs. I knew I had to make something with it. I ended up with these beautiful beauty bags. They don’t look like selfmade at all, it’s almost a pity 🙂


If you want to make one yourself this is what you need:

the sewing machine and a heat transfer press (it also works with the iron, but more difficult)

25 x 45 cm card stock with cut outs
25 x 45 cm paper collage from magazine pages
25 x 45 cm transparent heat transfer vinyl (I used one with glitter)
1 zipper 35 cm length
16 x 20 cm vegan leather
50 x 34 cm lining for inside the bag

First I heat pressed the 3-layer sandwich with magazine pages, then the card stock and on top the transparent htv to get the main material.

Then I made kind of triangles from the vegan leather on both ends of the zipper.

Add the zipper to the main material.

For the side parts of the bag cut 2 stripes 16 x 7 cm.

First sew the short side of the stripe on the bags bottom.

Then you do the side seams.

Inside of the bag there is the magazine paper. So you need a lining.

Close the side seams of the lining and the bottom corners.

Fit the lining into the bag, mark the slits with a pen and make a cut for the side slits.

Fix and sew the lining to the bag at the slits.


The last step is to stitch the lining to the zipper on top. I did this by hand sitting in the sun.

Ok, this was my first ever sewing tutorial I did in english and I was missing all the right expressions. I hope the pictures were self explaining somehow. Maybe I should rather stick with cutting and art tutorials :-).

Laminated feather book mark

I am playing a lot with the laminator lately, making a brochure for a laminator company. There is so much more, that you can do with the little machines than just business cards, signs and menus.
This was just a little test to try if I can actually run a big real feather through the machine and it worked unexpectedly well.

I used a feather I found in the woods when I walked the dog.
First I squeezed and broke the quill, that it is less thick and stiff. I put the feather on the opened laminating pouch. Then I added some sequins to the top and a ring from pink mirror card stock at the bottom.

I closed the laminating pouch and ran it through the laminator. It came out glossy and perfectly sealed.
If you don’t want the film to bend when it comes out just put some books in front and behind the laminator, just a little lower than the outlet.

Then I cut the feather with some distance, punched a hole into the card stock ring and added a ribbon.
It is a perfect little inexpensive present best coming with a book.

Thisone is for myself though and I use it directly for the book I will read during the next days outing myself as a Stephanie Plum fan 🙂
Happy easter!!!


A look behind the door

Yesterday I had a very special guest:

Johanna, a journalist from our local newspaper, who is writing a series of articles about artists living in our area.
This was a good reason (actually a MUST-DO) to tidy up my workshop, that has become a real mess during the last year.
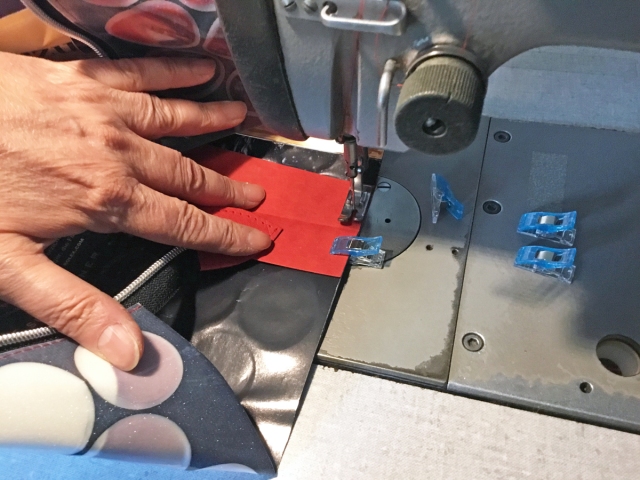
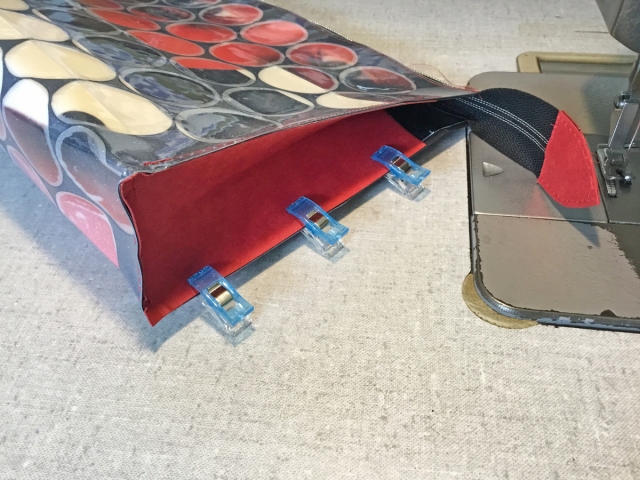
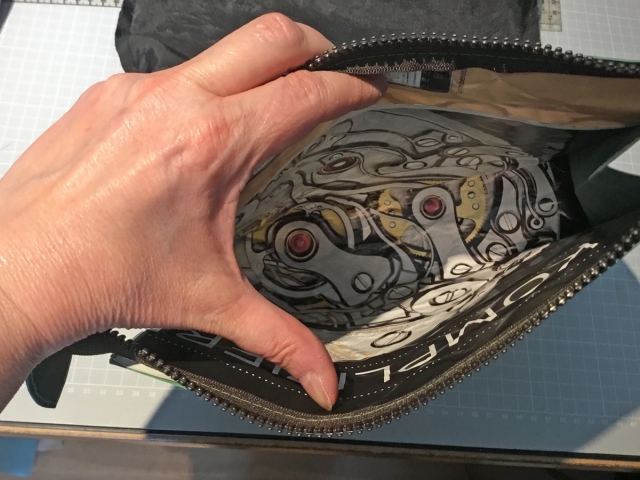
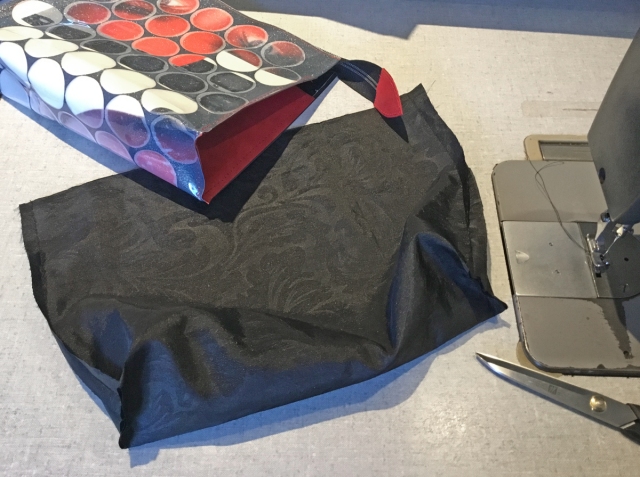
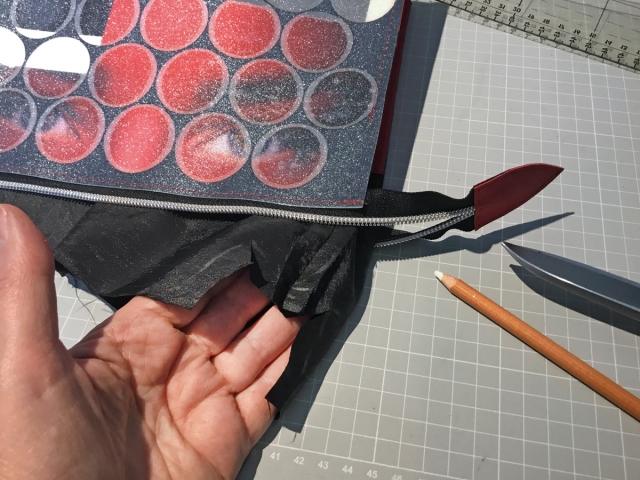
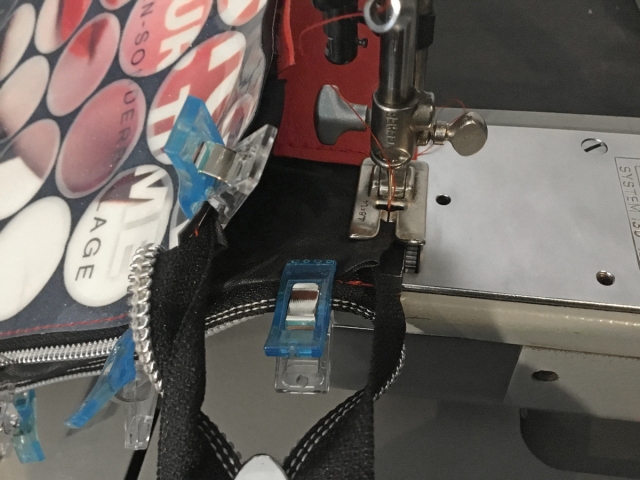
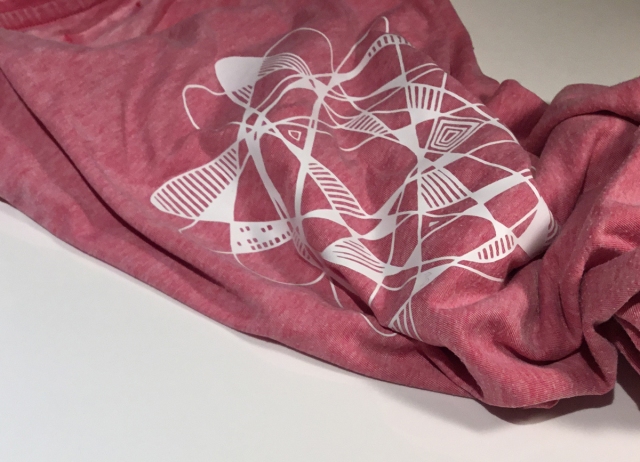
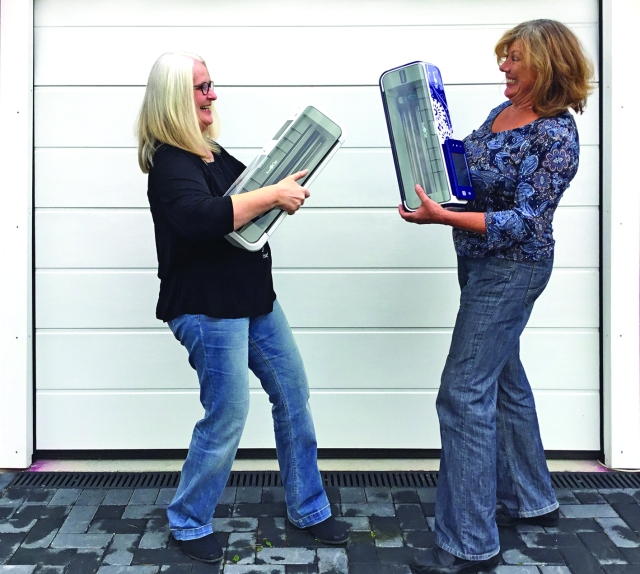
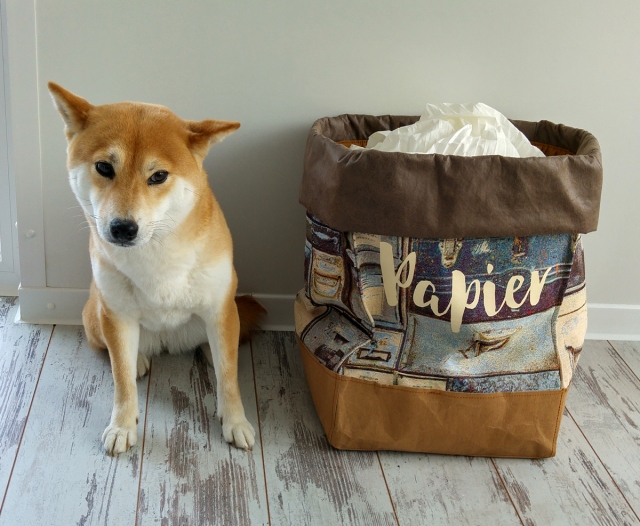
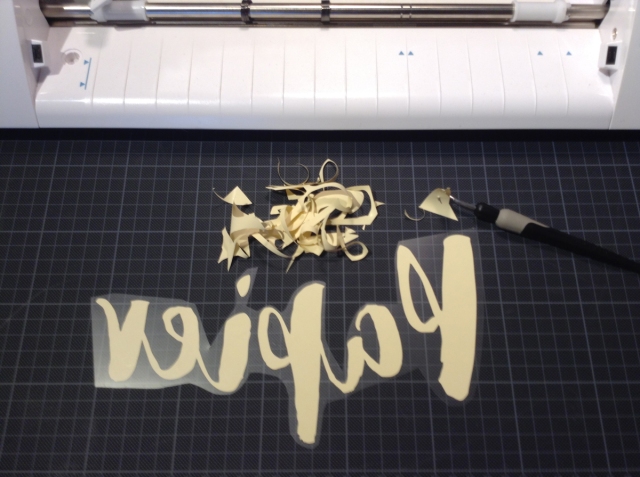
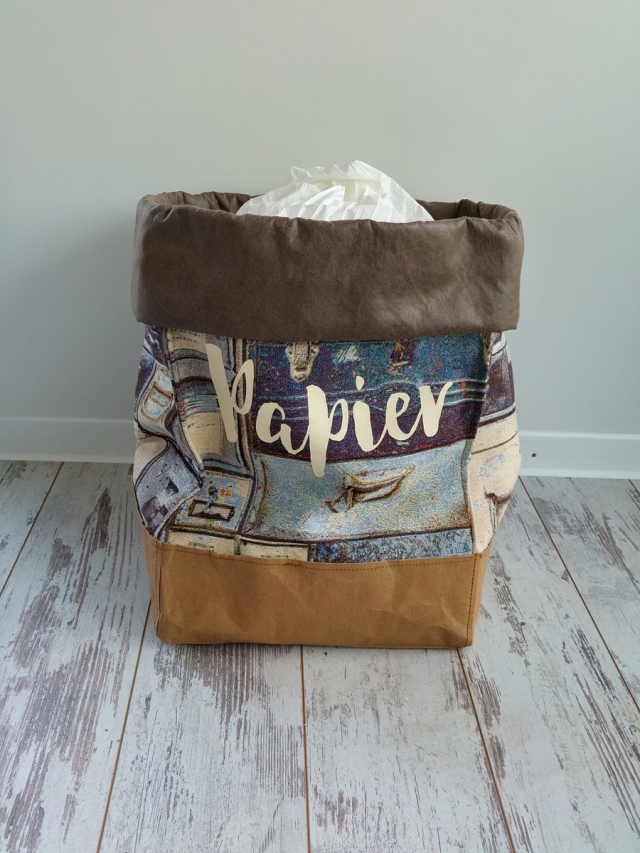
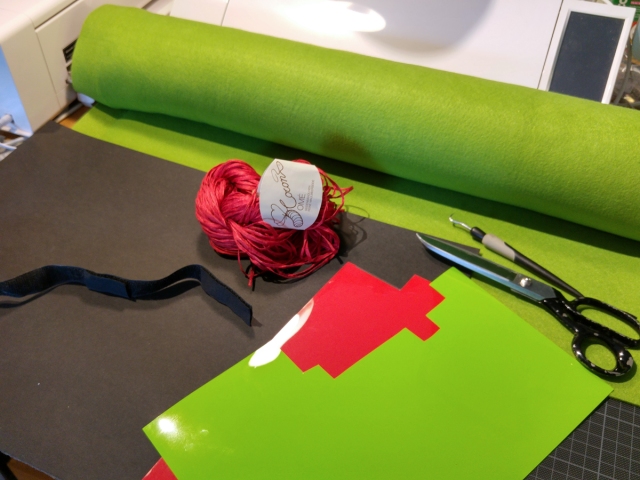
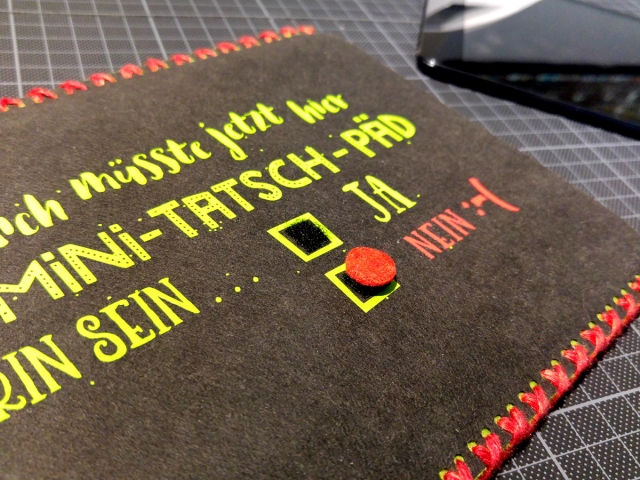
It was so much fun to meet her and we laughed a lot. She did not know much about electronic cutting machines, so we were creating a little sac in princess style for her daughter.

Johanna took a lot of pictures and I was so glad about my big clearing action, because pics do not hide anything.
Now I am excited about the article and hope it will be published soon.

johanna-und-ich

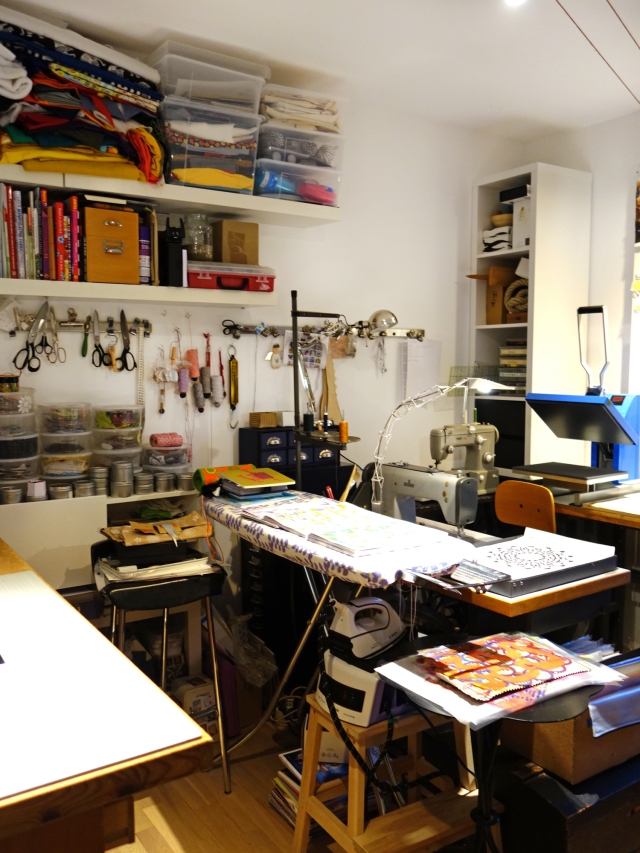
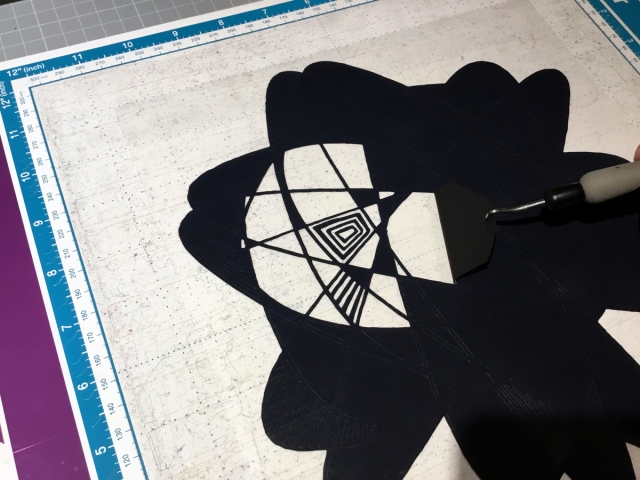
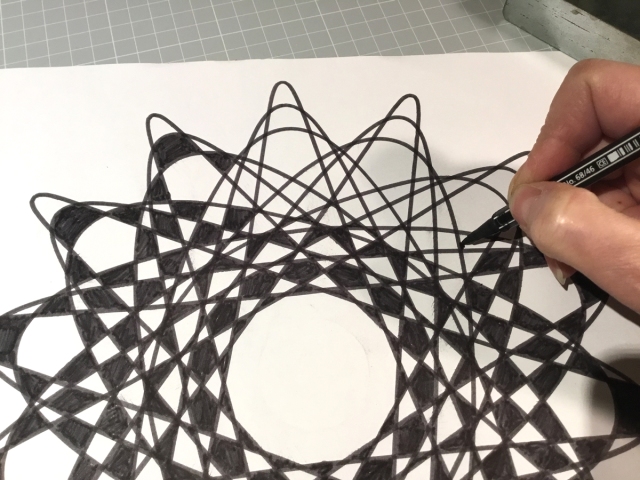
This was the chance to make my own pictures, too. Most definitely it will not look like that very long :-).
And honestly I still find it messy, but it is a workshop. Maybe you find some solutions helpful for yourself.
Have fun on the little tour!

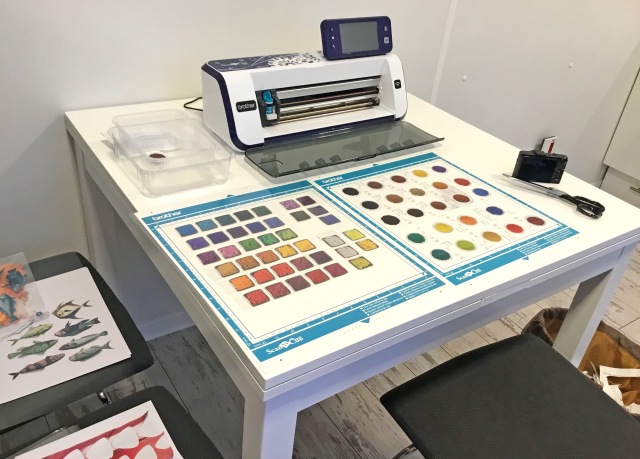
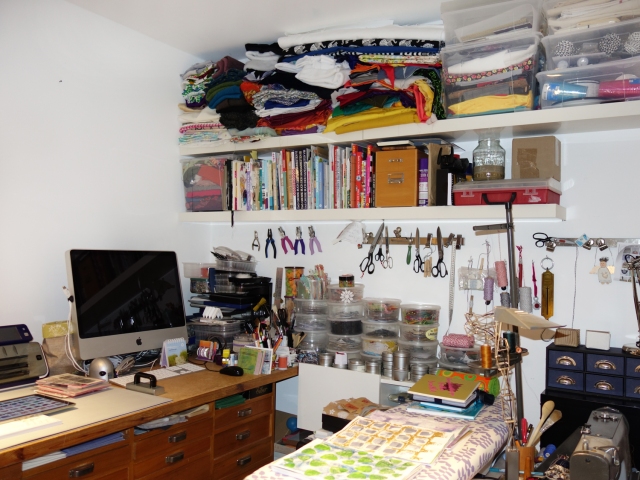
I started already in January with a new shelf from IKEA to keep all my machines, incl. mini printer, Mint and Xyron in one place, that makes it possible to take them out easily when needed. Who could have known a couple of years ago, that I will have five cutting machines one day. Surely not me!

maschinen

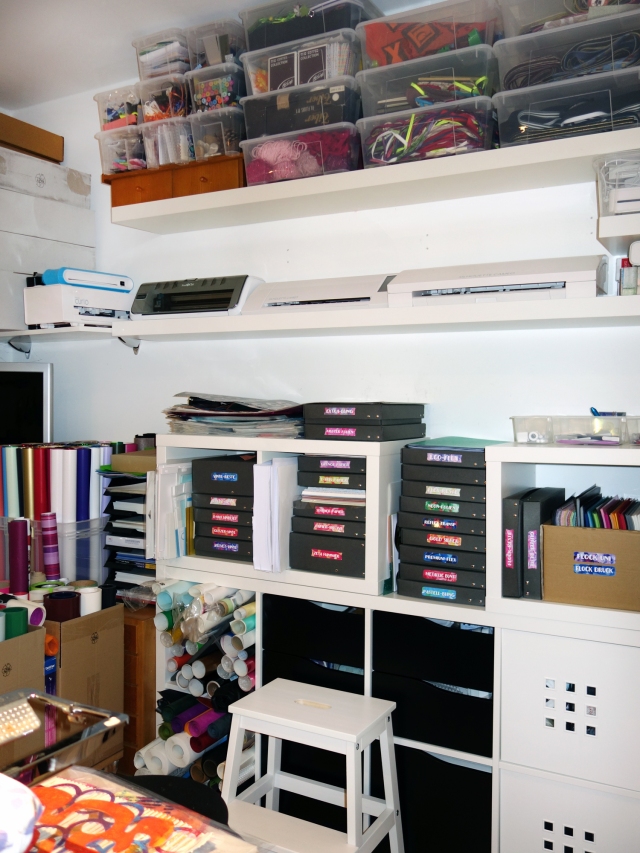
The transparent boxes on top are also from IKEA and cost almost nothing. A great way to keep similar things together and visible. When you have so much stuff you have to see it to find it when it is needed.
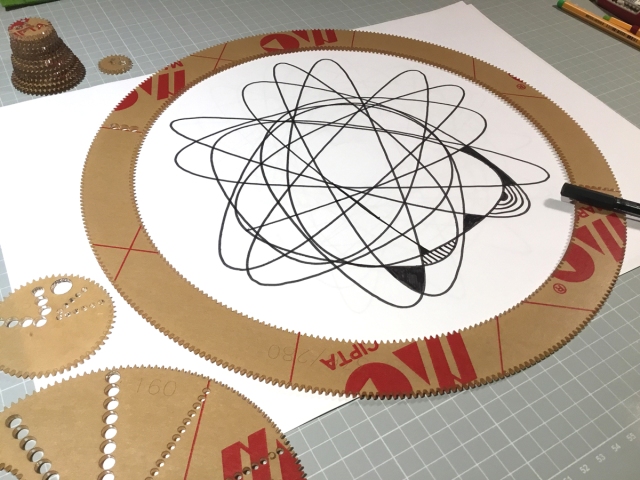
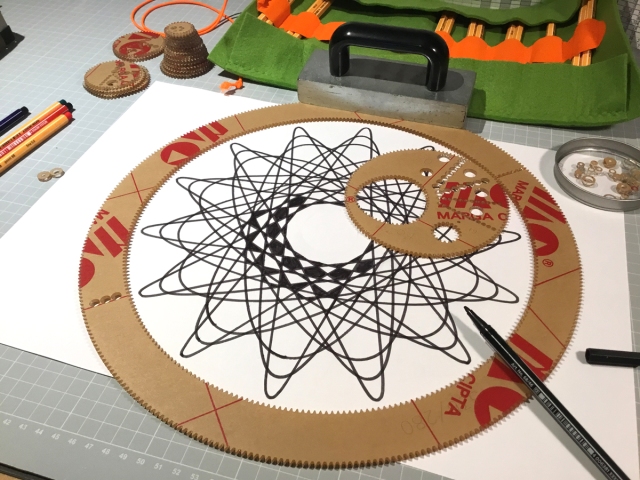
In the corner behind the door you can see my wild gears hanging on the wall.
And at the door handle I forgot to take away some of my book projects :-).

tuer

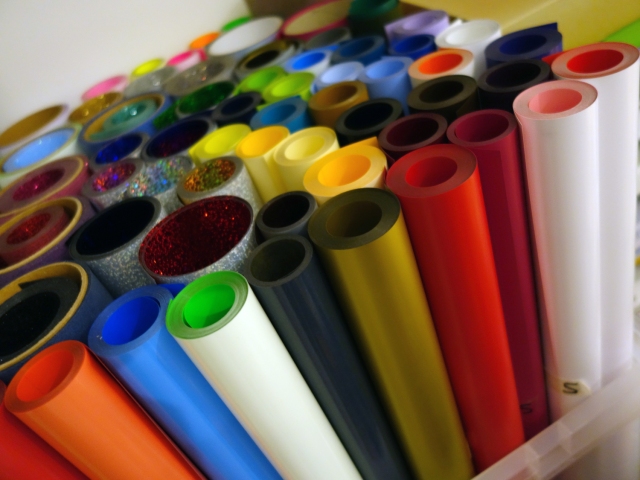
A simple straight box keeps all the heat transfer vinyl rolls.

folienrollen

An assortment of ready-cut sheets I keep in black boxes with colorful labels.
I sell those sheets in my Etsy shop, so I have to have them well sorted. Otherwise it takes ages to pack orders for customers.
The green folder on top keeps the cutting and ironing instructions, that I send with every order.

boxen

On the opposite side you see my work table. I love to work while standing, so it it high, just a board on a cabinet with flat drawers from my fathers former optician shop, just as old as me.
The ironing board is a handy storage place when not needed for ironing.

arbeitsplatte

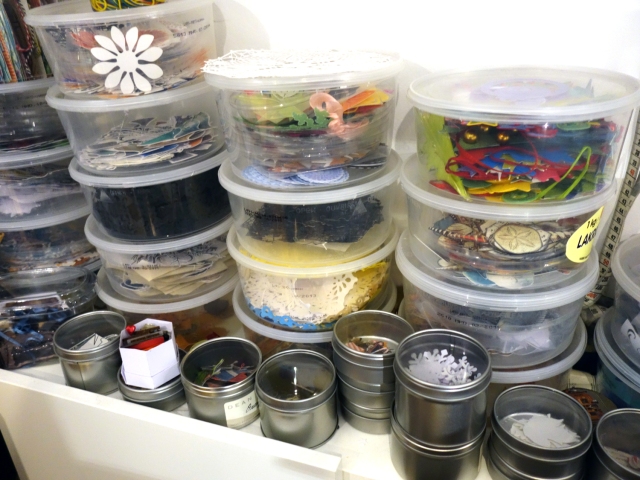
I keep a big collection of die cuts, scraps, ready cut embellishments and tags in candy boxes. Most of them are test cuts from my own collage sheets and I use them for card making, gift packaging and to dress up packages for customers.

diecuts

And this is the sewing corner.
Since many years I use an industrial sewing machine (left side), a real hard worker I would never give away.
Since one year I have the heat transfer press (the blue thing on the right side), a great addition to the cutting machines.

naehecke

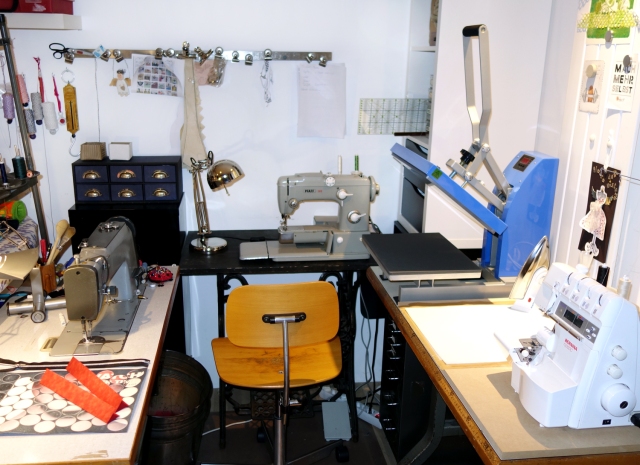
When my mom passed she wanted me to have her old Pfaff sewing machine, which I use now in replacement of a simple machine, that I only used for works the industrial machine doesn’t do: zigzag, embroidery and button holes:
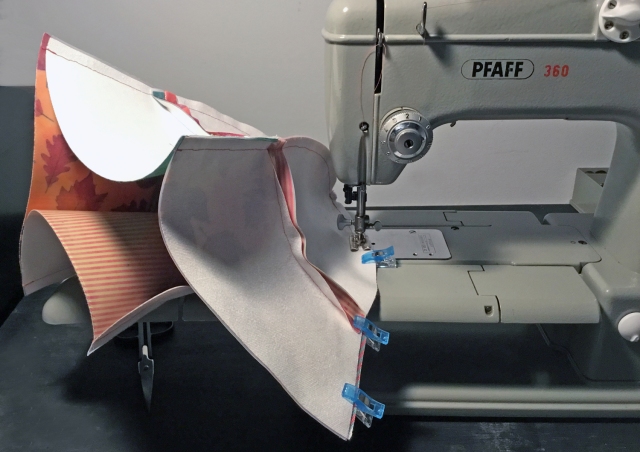
But mom’s Pfaff is from such a fantastic quality, so strong, that meanwhile I do almost everything with it.
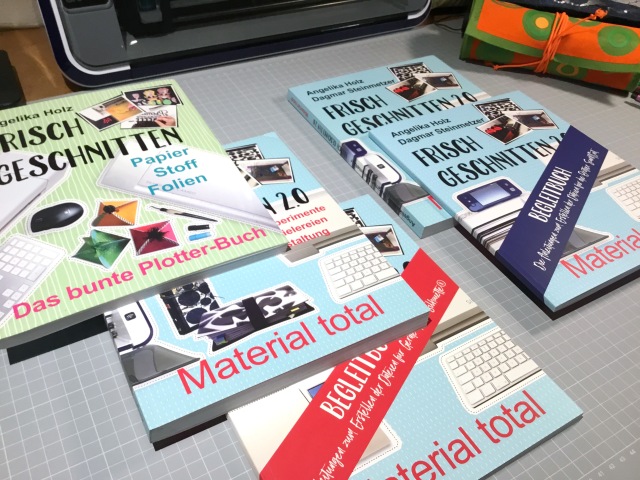
And the classic look of this antique machine was just perfect to be used in my latest book for the pictures of the sewing projects.

hutnaehen

One look back and the door will be closed again for the next creative mess starting tomorrow morning …

alles

Maybe the most stupid mistake you can make with a gelli plate

…is not to remove the cover from your brand new big size gelli plate before using it.
And it just happened to me. Having my head in the clouds, thinking of many too many other things having on my “plate” right now. After 4 prints I was wondering what was wrong with my acrylic colors today – too cold, too old, dried out… and then I saw it!!!

But let’s just call it artistic freedom and enjoy those much too dry, but interesting looking prints.

Another good thing is, it will never happen again, because the cover sheet now was much too beautiful with my self scanned and cut multi layered stencils, so that I did not clean it. It goes into the package after using just like this.

Enjoy your weekend and happy crafting,

Angelika

gelliplate

gelliplate1

cutting-stencils

gelliprint2

gelliprint3

gelliprint1

gelliprint4

my-studio


More spirograph art on t-shirts and shopping bags

And I found more ornaments made with the wild gears, that work to be cut from heat transfer vinyl to be ironed on t-shirt and shopping bags.
I LOVE the irregular motifs made with 3 wheels (another wheel in a big “hole” of the inner wheel) . You have to stop at some point, otherwise it will become a regular circle in the end with too many small shapes.

The start position of the wheels make a big difference how the ornament looks like. I started 3 times to get the result below, that gave me bigger parts to be filled with hand drawn lines.

I also made some ironing tests on shopping bags not expecting, that they are getting so beautifully.
They will make nice presents.

wild-gears-ornament

spirograph-shirt

wild-gears-ornament2

spirograph-shopping-bags

wild-gears-ornament1

This was another test to work with very thin lines. Even with flocked material (velvet htv) it worked well.
The green ornament was a real challenge though and I had to rework the cutting by hand with a craft blade. But I am glad I did it, peeling away the overlapping edges to get 3 different designs of one pattern.

neon-spirographart1

neon-spirographart

neonshirt

Have a great weekend!

Angelika

Making a spirograph drawing into a t-shirt design with the ScanNCut

I did it again!
Two years ago I got my first two sets of wild gears and I had so much fun with it. Now, 2 years later I discovered there are new additions, so I made myself a big gift and ordered 3 more sets.

Again it was so special to unpack them.
This time I did not remove the brown protection paper, that I could clearly see which were my first sets and which are the new parts.
After some playing and trying I made a big ornament, that could be used as a t-shirt design.

What a fun to combine 3 very different techniques:

  • drawing with the spirograph
  • scanning and cutting with the ScanNCut
  • and ironing-on my own drawing on fabric

For the spirograph drawing I used a thick black Stabilo pen (68-series).
The contrasts and image quality were good enough for the built in scanner of the Brother ScanNCut to get all the lines and edges.
I scanned it and saved the data in the machine.

Then I chose gold metallic htv in full size, 12 x 12 in for cutting and after the result was great I just cut another one in copper.
Weeding was a job while watching TV. It took a while…

Lucky who got a heat press. 15 seconds pressing each and my new t-shirts were ready to wear.

Have a great weekend,

Angelika

wild-gears-spirograph1

wild-gears-spirograph2

wild-gears-spirograph3

wild-gears-spirograph4

wild-gears-spirograph5

spirograph-scanncut1 spirograph-scanncut2 spirograph-scanncut3

heattransfer-scanncut

heattransfer-scanncut1

heattransfer-scanncut2

heattransfer-scanncut3

Looking back at 2016

I just don’t want to miss to send some greetings at the end of the year hoping you have a good start into the new year tonight.

2016 was maybe my most busiest year ever.
I just cannot believe my last blog post was in April.

Keeping it short I just show 3 things:

1. my favorite new toy
2. my new book
3. our new family member “Arthur”

So lets start with my new favorite toy.
Since it was released in 2013 I wanted a Brother ScanNCut, but it was impossible to get them in Germany.
So I got a Silhouette Cameo and I was happy with it. I presented the machines on a craft show, then started to sell the machines, gave workshops and even have written a book, a kind of manual, which is still very successful.

But I just couldn’t get the other machine out of my mind, so in 2016 I had a good excuse:
I needed a new challenge and got the ScanNCut CM900 (or ScanNCut 2).
But I also felt like a traitor, being the Silhouette specialist. So I kept the ScanNCut secretly hidden in my workshop 🙂

scanncut

Of course I could not hide it from my friend Dagmar, who had talked me into making a new book, a second part of “Frisch Geschnitten” experimenting with all kind of materials and she would help and be my co-author.

snc-werfen1

06macarons-drucken

dagmar-und-ich-unterm-schirm

taschen

While we were planning, playing and creating we decided to make the book working for both types of machines, which was a stupid idea. It just didn’t work, because the machines were too different. So we ended up actually making 2 book-sets, one with all the technical stuff for the Silhouette®  machines, and another with the tutorials for making the projects with the ScanNCut.

In the end even with skipping a lot of ideas we had 40 different projects, every book-set was more than 300 pages and we were done.
But there was no time for a rest, because in the meanwhile it was fall and the books had to be produced, sold, packed and sent.

Looking back I am very glad we chose this way. There are so many german brother – users who are glad about some help, because there is not much information in german language just like it was the year before for the Silhouette® machines.

frisch-geschnitten2

With all the crafting, sewing, writing I hardly made it to keep the house half way in order, actually it was an ongoing mess me working around the clock. So we decided to buy a vacuum cleaning robot, which was the best idea ever. After some research we chose the brand new Vorwerk Kobold. No, this is not advertising. I am just so happy with “him”.
We called him Arthur and he makes my life much easier. Our dog was used to Arthur in no time. He is walking through the house every second day “eating” everything like dust, threads, paper bits, sand, socks (you better take care they are somewhere else than on the floor). He is finding his way all alone. He stops before barriers without touching them, so cool and walks back to his loading station when he needs to be charged. When he needs to be emptied he makes a sound. And his noise while sucking is much less than a normal vacuum cleaner. So this is just the best household appliance we got in 2016.

arthur

Now I can only promise I will write regular posts on my blog again in 2017.

Take good care and have a great new year!

Angelika


Wastebasket – sewing project from different materials

Another sewing project from the beautiful materials I lately bought is a new wastebasket, well it is rather a waste sack.
I love it to be soft and flexible and fitting the fun vintage faux wood floor from our new garden house.

I did not make or use a pattern. I just measured and cut the square and rectangles pieces.
The bottom I made from a square vegan leather (SnapPap which is actually paper) and 4 rectangles. Then I added the wonderful jacquard fabric from the crafts show. On top I added a matching piece of faux leather fabric and for the inside I used a piece of silk I found in my stock.
With the Silhouette Cameo I cut and then ironed the word “Papier” on it, which is “paper” in German

Our lovely dog Akira does not trust any box or bag, but when she felt how happy I was with her sitting next to the new sack she started to relax. And in the end she even had fun in the photo session and showed me her typical Shiba smile.

Have a great and crafty weekend!

papierkorbsack2

papierkorb-material

papierkorbsack0

papierkorbsack1

papierkorbsack

Material shopping at the crafts show and my first project: a new iPad mini cover

Two weeks ago I spent 4, yes, four luxury days at Germany’s biggest crafts show CREATIVA together with a crafty friend. It was great to have enough time to look at everything without a hurry and not having the need for “panic purchases”. The only limit was the luggage, because we have been there by train and had to carry everything back to Berlin ourselves (a big thank you to the inventor of the suitcase on wheels!).

It was pure seduction and I discovered sewing again for me, which I haven’t done in ages. I loved the great choice of coated fabric for bags and purses, beautiful thick jacquard pattern fabric, faux leather, cute ribbons and colorful felt.

I learned about a new felt technique and bought dutch hand dyed wool. I will write about it when I tried it being able to show first results.
So our suitcases were more than full, deposited at the train station on the last day and we still came back with a big bag on top to go home. Then unpacking and showing of our treasures was just a little bit like christmas and I did NOT forget to bring gifts (which also reduces discussions about quantities of more or less necessary new crafts materials…hahaha….)

creativa2016

All new materials and techniques can be combined with electronic cutting, still my first passion, very well.
So I started first to create a new cover for my iPad mini, which I needed urgently, because my existing one falls apart.

ipad-Huelle-benutzt
First I have drawn around the iPad and imported the correct shape and size via PixScan mat into Silhouette Studio.

ipad-Huelle-pixscan
Based on this pattern I added an outline and the holes for sewing, created a fun german word art and colored the design to find the colors I like most.

ipad-Huelle-Datei

ipad-Huelle-material

Next I cut 2 pieces with my Silhouette Cameo from faux leather paper (called SnapPap in Germany and similar to the Silhouette Vegan Faux Leather)

ipad-Huelle-snappap

The 3mm thick green felt I cut with the Silhouette Curio with the deep cut blade. Of course it only cut 2mm, but did this very well. This way I had a clear shape, a deep cut line and I could cut the last 1m just with a scissors by hand.

ipad-Huelle-curio

Then I have stitched together by hand all 4 layers through the holes with a big needle and a thick silk yarn, originally meant for knitting, with a zigzag stitching. With the help of two little pieces of Velcro I made a dot to fix with “yes” or “no”.
Now the iPad is well protected when thrown into my handbag and eye-catching when lost in the crafts room mess.
I really hope this works, because I am searching for it too often …

ipad-Huelle1

ipad-Huelle